Introduction
When I rearranged my room, I suddenly wanted to replace my old NAS.
I have used this.
It was so useful NAS, But It was a bit large.
So I had tried to replace NAS with NUC, but it wasn’t stable because my NUC had a problem in its power unit.
Then I heard cases that build NAS with Linux single board, so I thought to try it with hobby.
Board selection
I could choice within some board.
| Linux SBC | URL |
|---|---|
| Raspberry Pi 3 B+ | https://www.raspberrypi.org/products/raspberry-pi-3-model-b-plus/ |
| RockPro64 | https://www.pine64.org/rockpro64/ |
| NanoPi M4 | https://www.friendlyarm.com/index.php?route=product/product&product_id=234 |
Raspberry Pi
Raspberry pi is handy board to build lightweight NAS, and there are many cases. But it has constraints by USB 2.0.
max speed of gigabit ethernet is restricted max speed of USB 2.0. If I want to connect a storage, I can connect this through USB port, but it is also 2.0.
RockPro64
I found Rock64 during search another board. There are also several cases with it.
And I found more stronger board “Rock64Pro”.
This board have a powerful SoC “ Rockchip RK3399”, have high performance much more than BCM2835, and have PCIe interface.
It isn’t bad choice.
Nano Pi M4
And when I searched continuously cases with RK3399 board, I finally found “Nanopi M4”.
Consequently, I choosed this board, Following are decisive factors.
1. Same size as a Raspberry Pi.
RockPro64 has a size twice Raspberry Pi, But Nanopi M4 is same size as a Raspberry Pi.
(But you can’t use Raspberry Pi case to NanoPi M4 because additional PCIe PINs)
2. I can add SATA interfaces to this board.
I thought USB3.0 has sufficient speed to connect a HDD. however I found a interesting HAT.
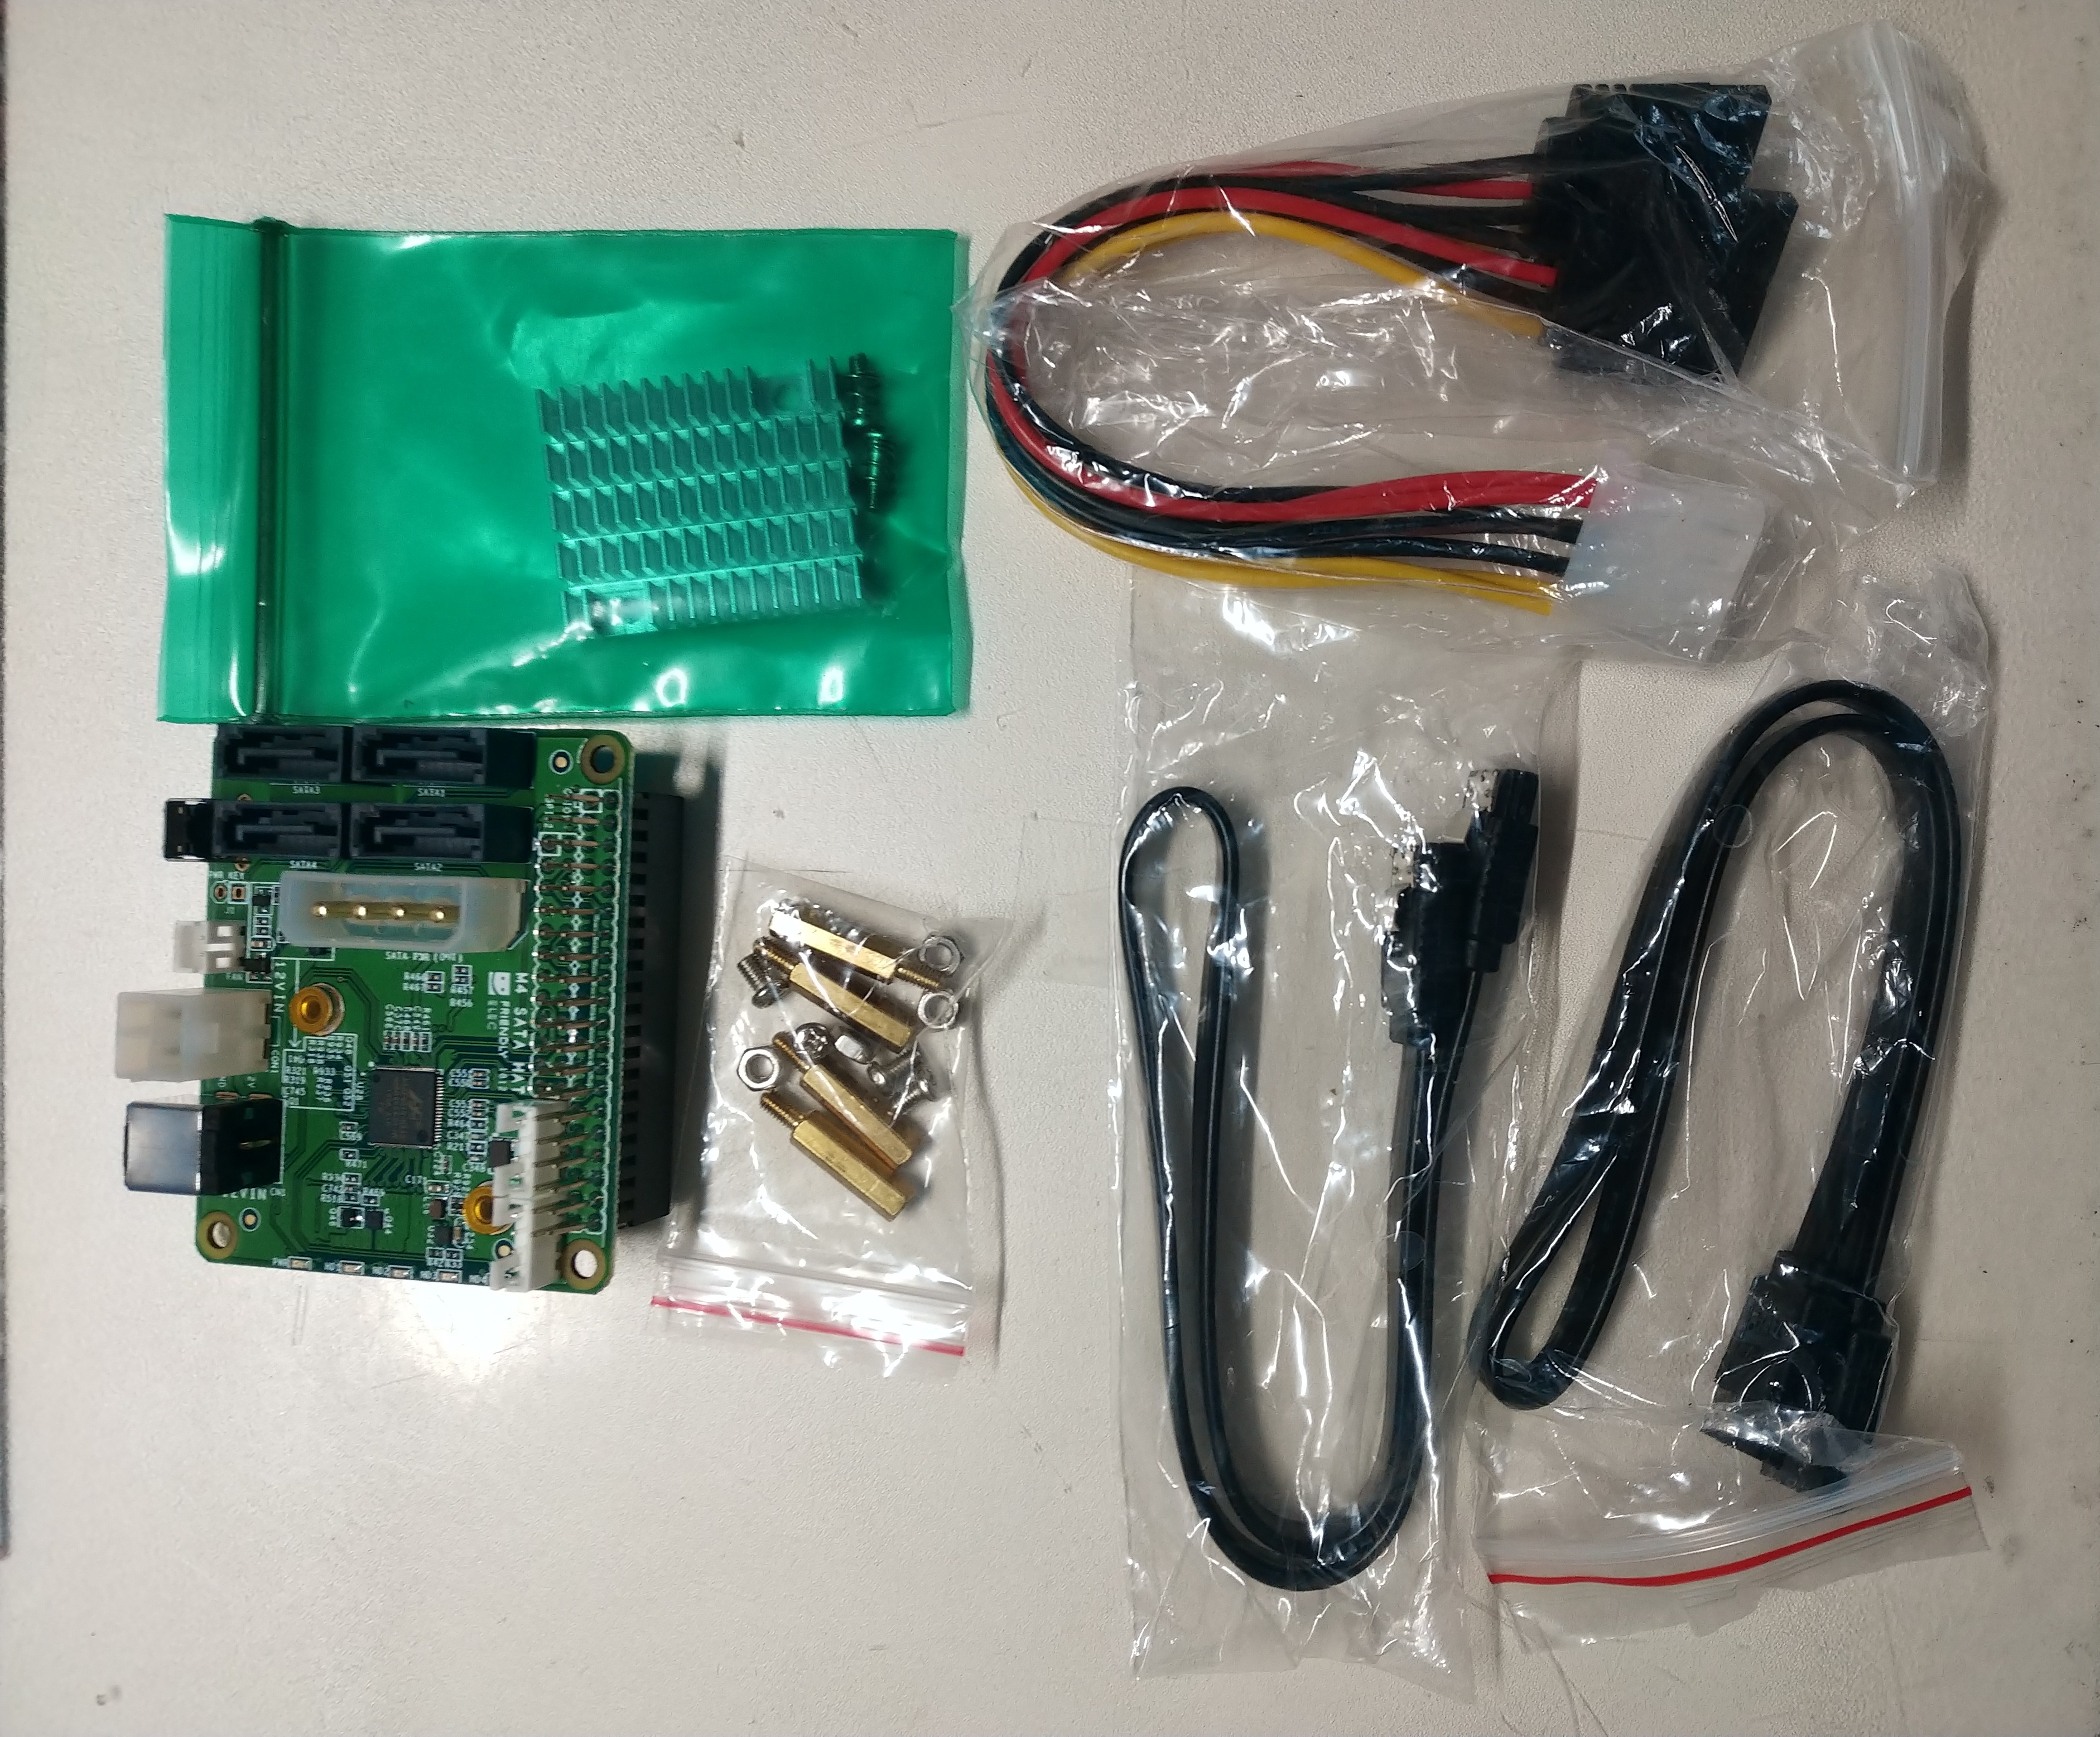
4x SATA HAT for NanoPi M4
https://www.friendlyarm.com/index.php?route=product/product&product_id=254
This HAT can add SATA interfaces to NANOPi M4, So I can connect SATA HDD directly.
When I found this board, I felt this is interesting.
Purchase
I bought this in Friendly Elec official site.
And I added these options.
| Choiced option | Remarks |
|---|---|
| DDR3 4GB RAM | I didn’t want to have a trouble caused by insufficient memory. |
| HeatSink | This big heatsink is mandatory to heat control of RK3399. |
| 32GB eMMC Module for NanoPi | Nano Pi M4 has eMMC slot, so if you have this, You can boot this board without SD card. |
| 4x SATA HAT for NanoPi M4 | You also can purchase it as a option of the board. |
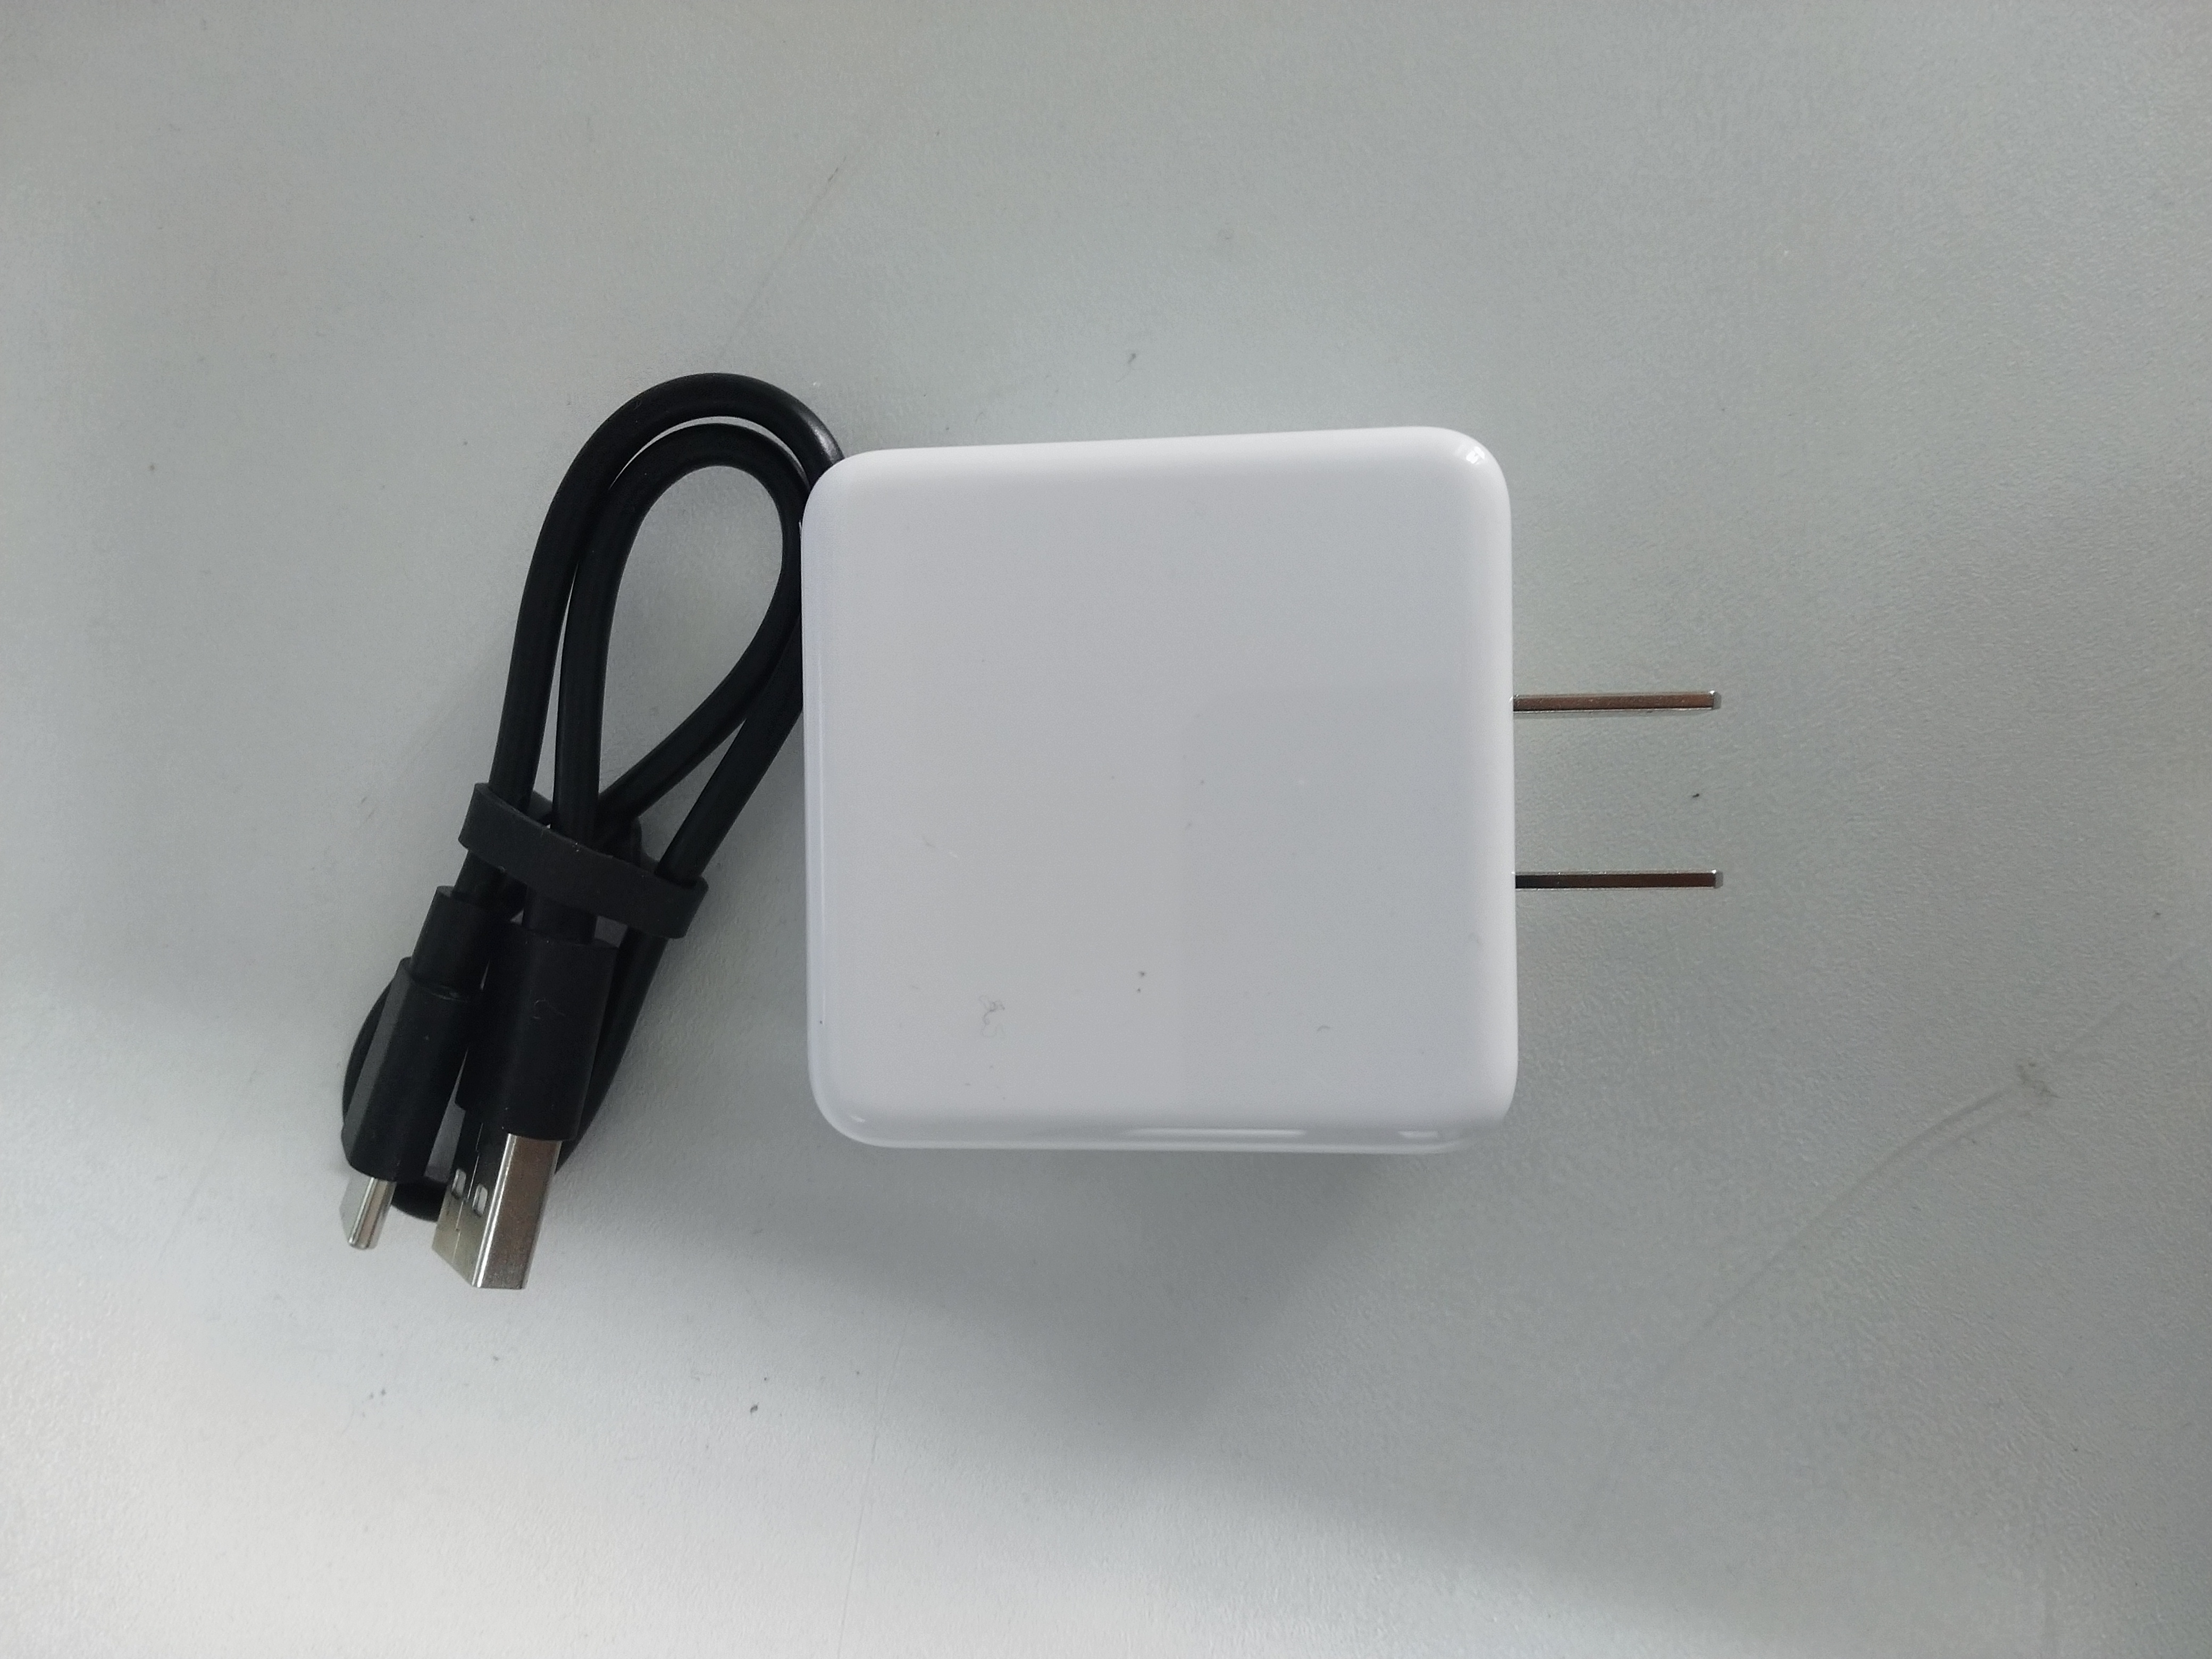
| 5V 4A Power Adapter | If you use a SATA hat, it isn’t mandatory, but I thought possibility of using this board standalone. |
| High-Power Type-C to USB-A Male 2.0 Cable - 30cm | as above. |
And you have to consider a power source of this board.
Power adapter
Nano Pi M4 usually use power source of 5V/3A(through USB type C), but if you use a SATA HAT, you have to prepare an AC adaptor.
This adaptor have to supply more than 12V/2A, and if you want to use four 3.5 inch HDD, must supply 12V/5A.
You can use PC ATX power source alternatively, but I wanted small power source because my objective is building a small SATA NAS.
You can check these constraints in official site.
https://www.friendlyarm.com/index.php?route=product/product&product_id=254
I have already had an AC adaptor(12V/2A), so I didn’t purchase an adaptor. But if you haven’t an adaptor, You can purchase in official site it.
Shipping
I choosed a shipping option as EMS, and this goods delivered by DHL.
I purchased it at 6/2 and I received at 6/7.
Received item
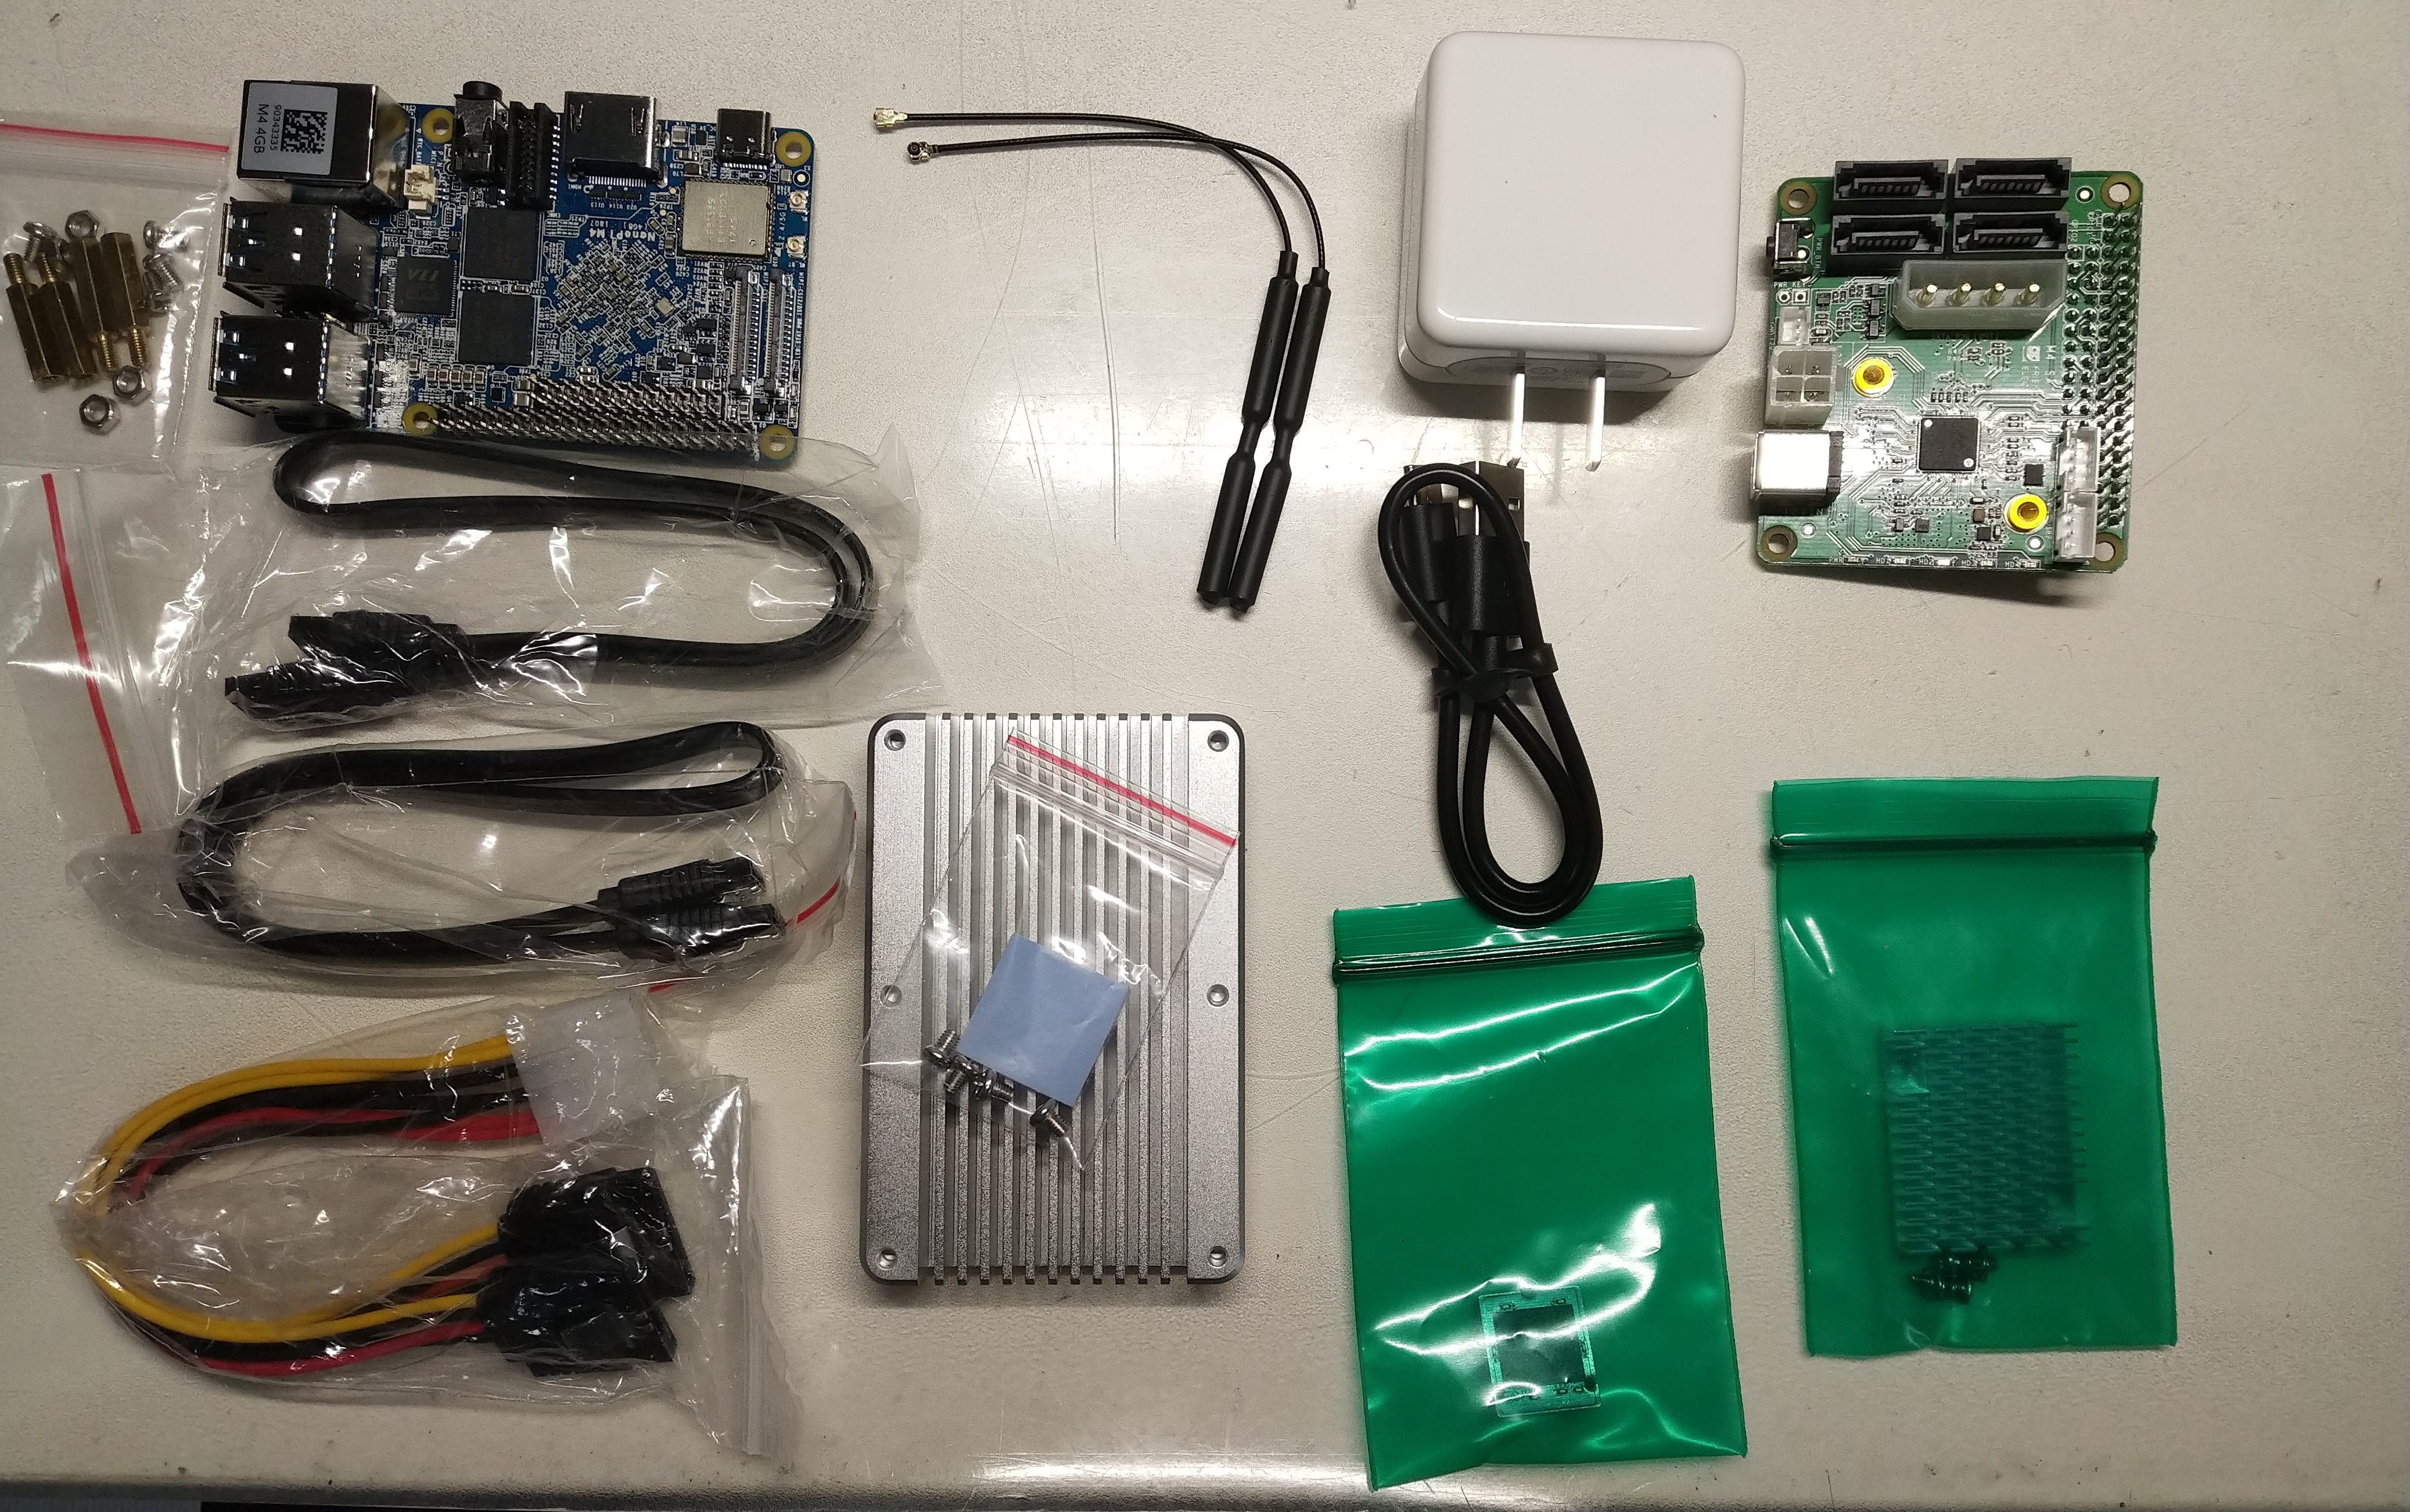
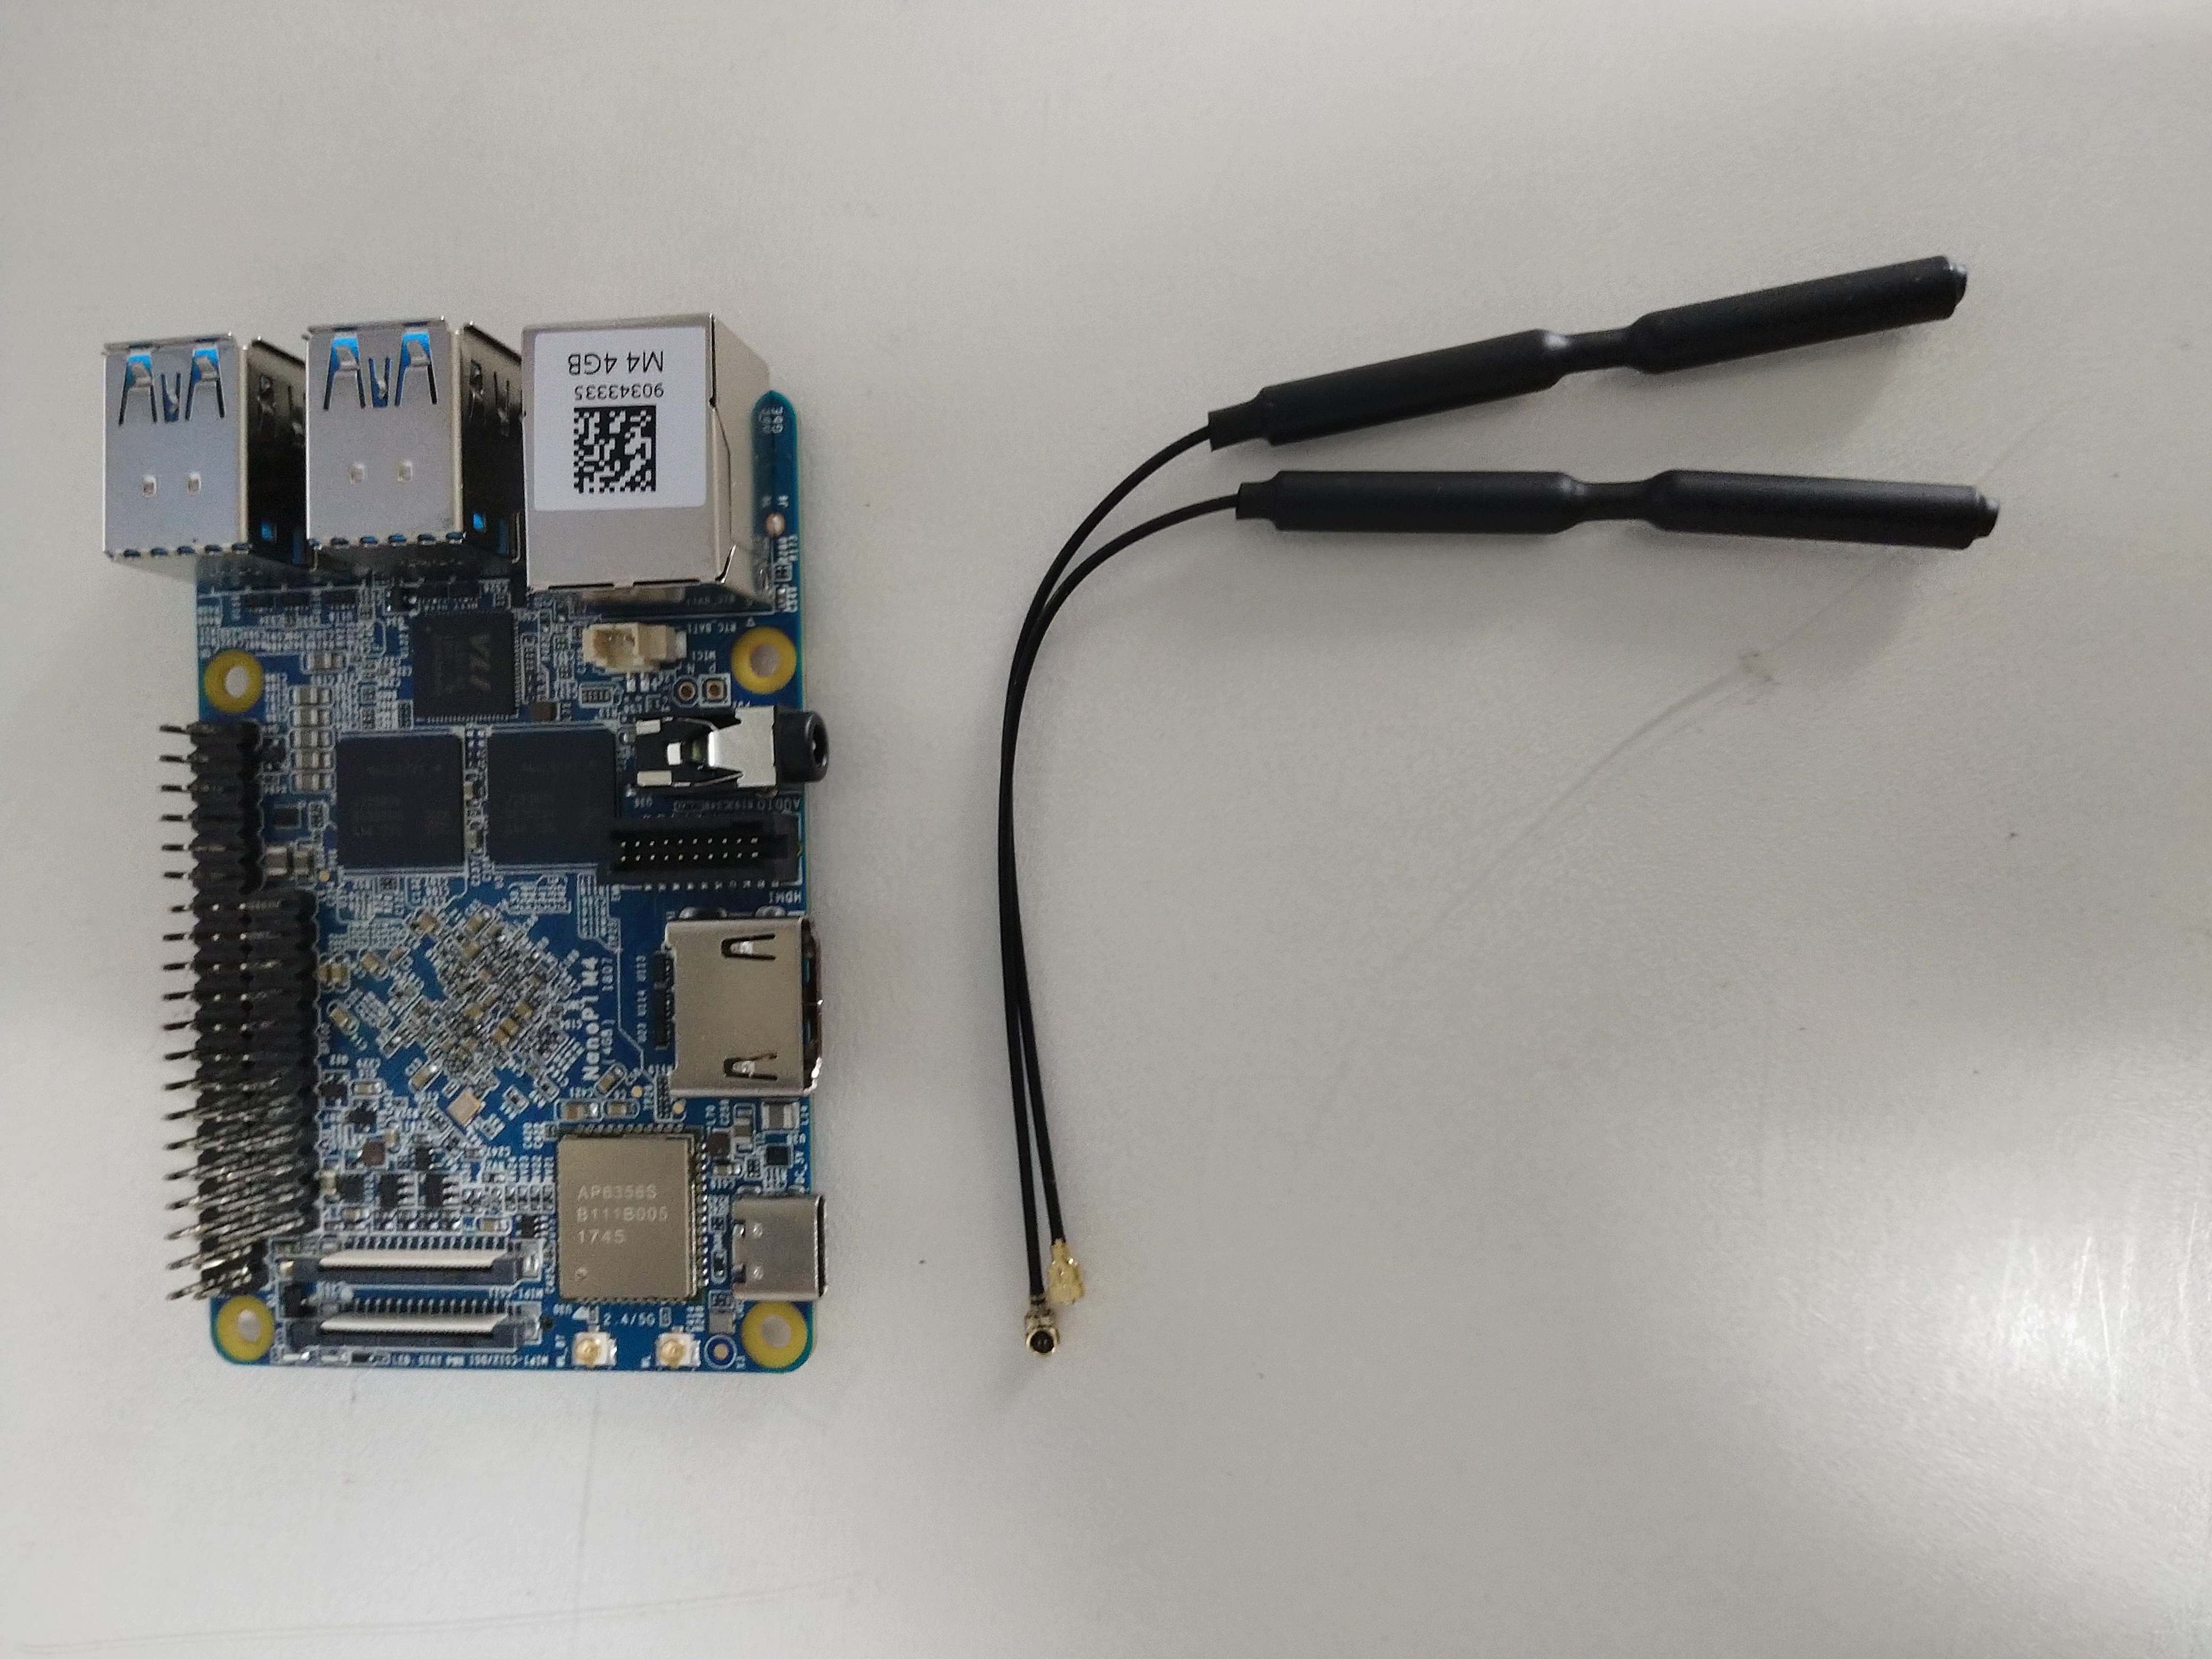
Nano Pi M4
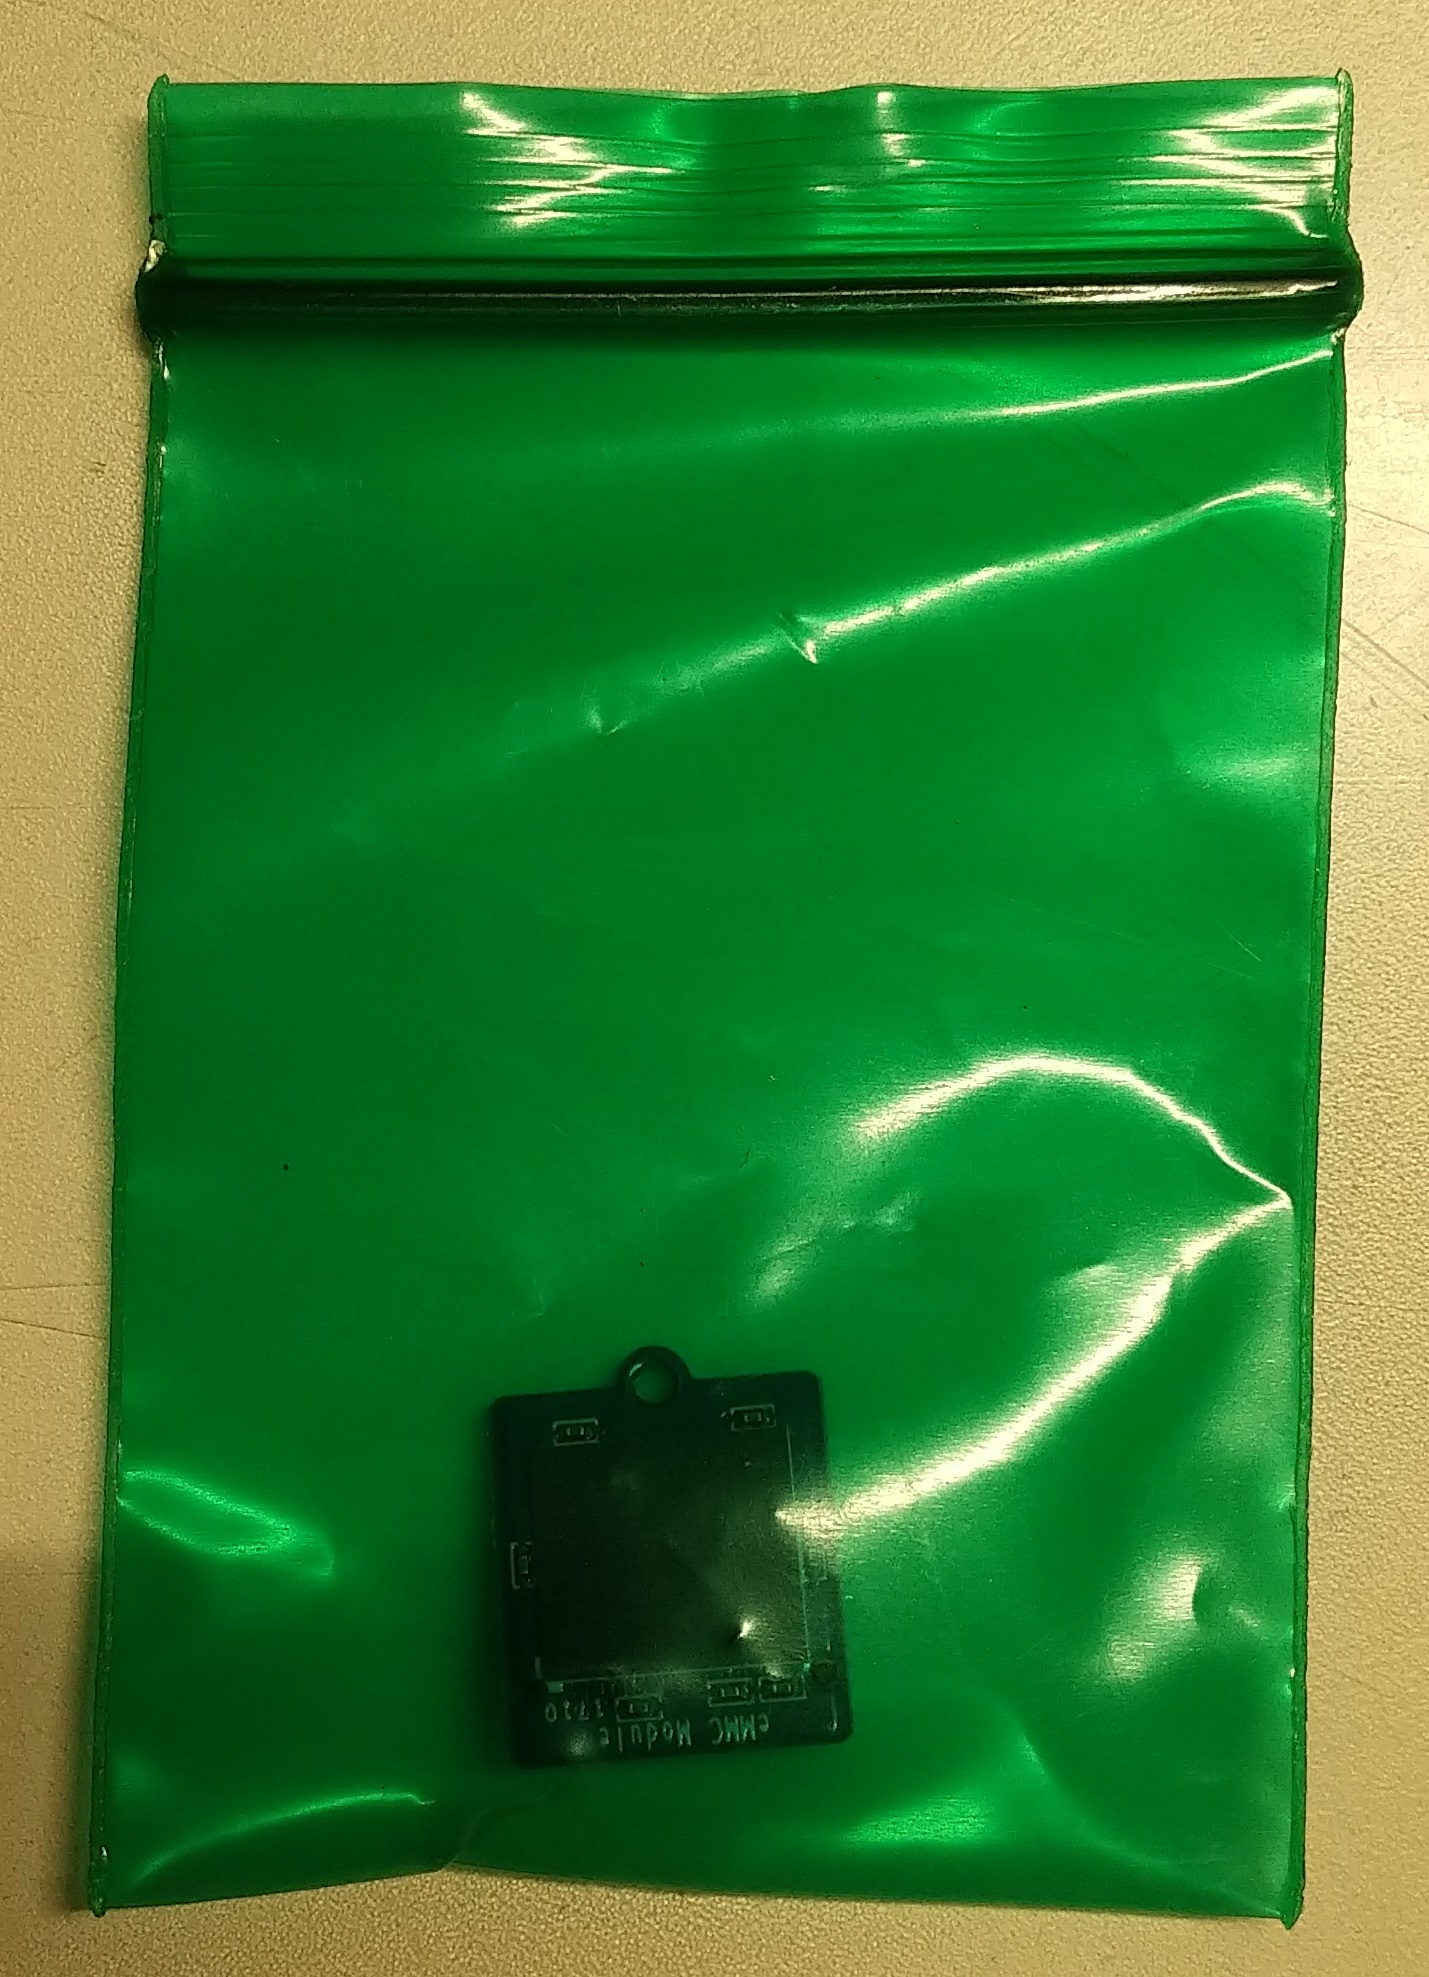
eMMC
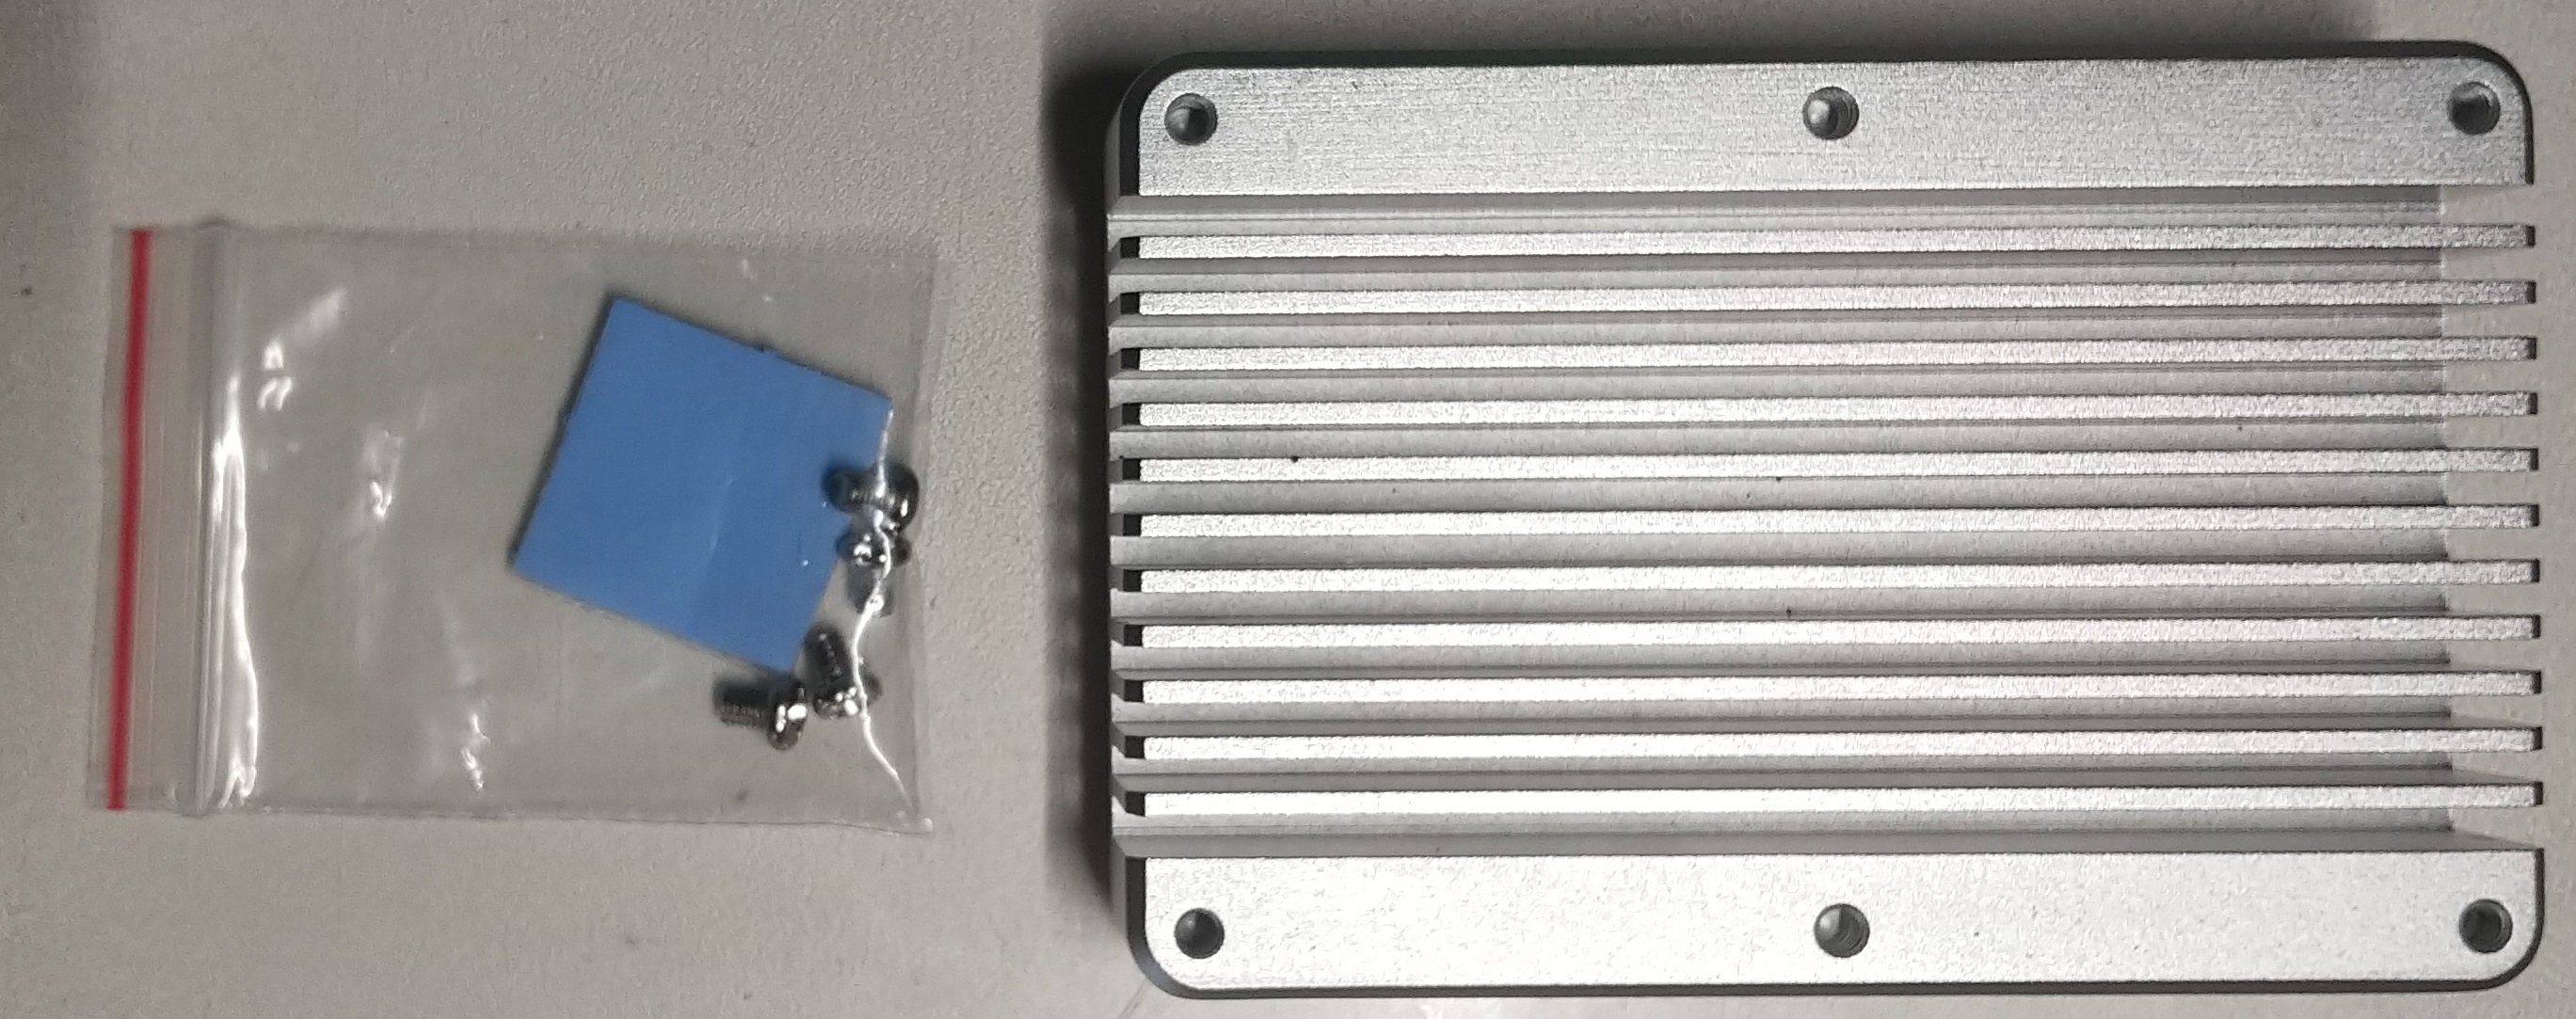
Heatsink
USB Adaptor
SATA Hat
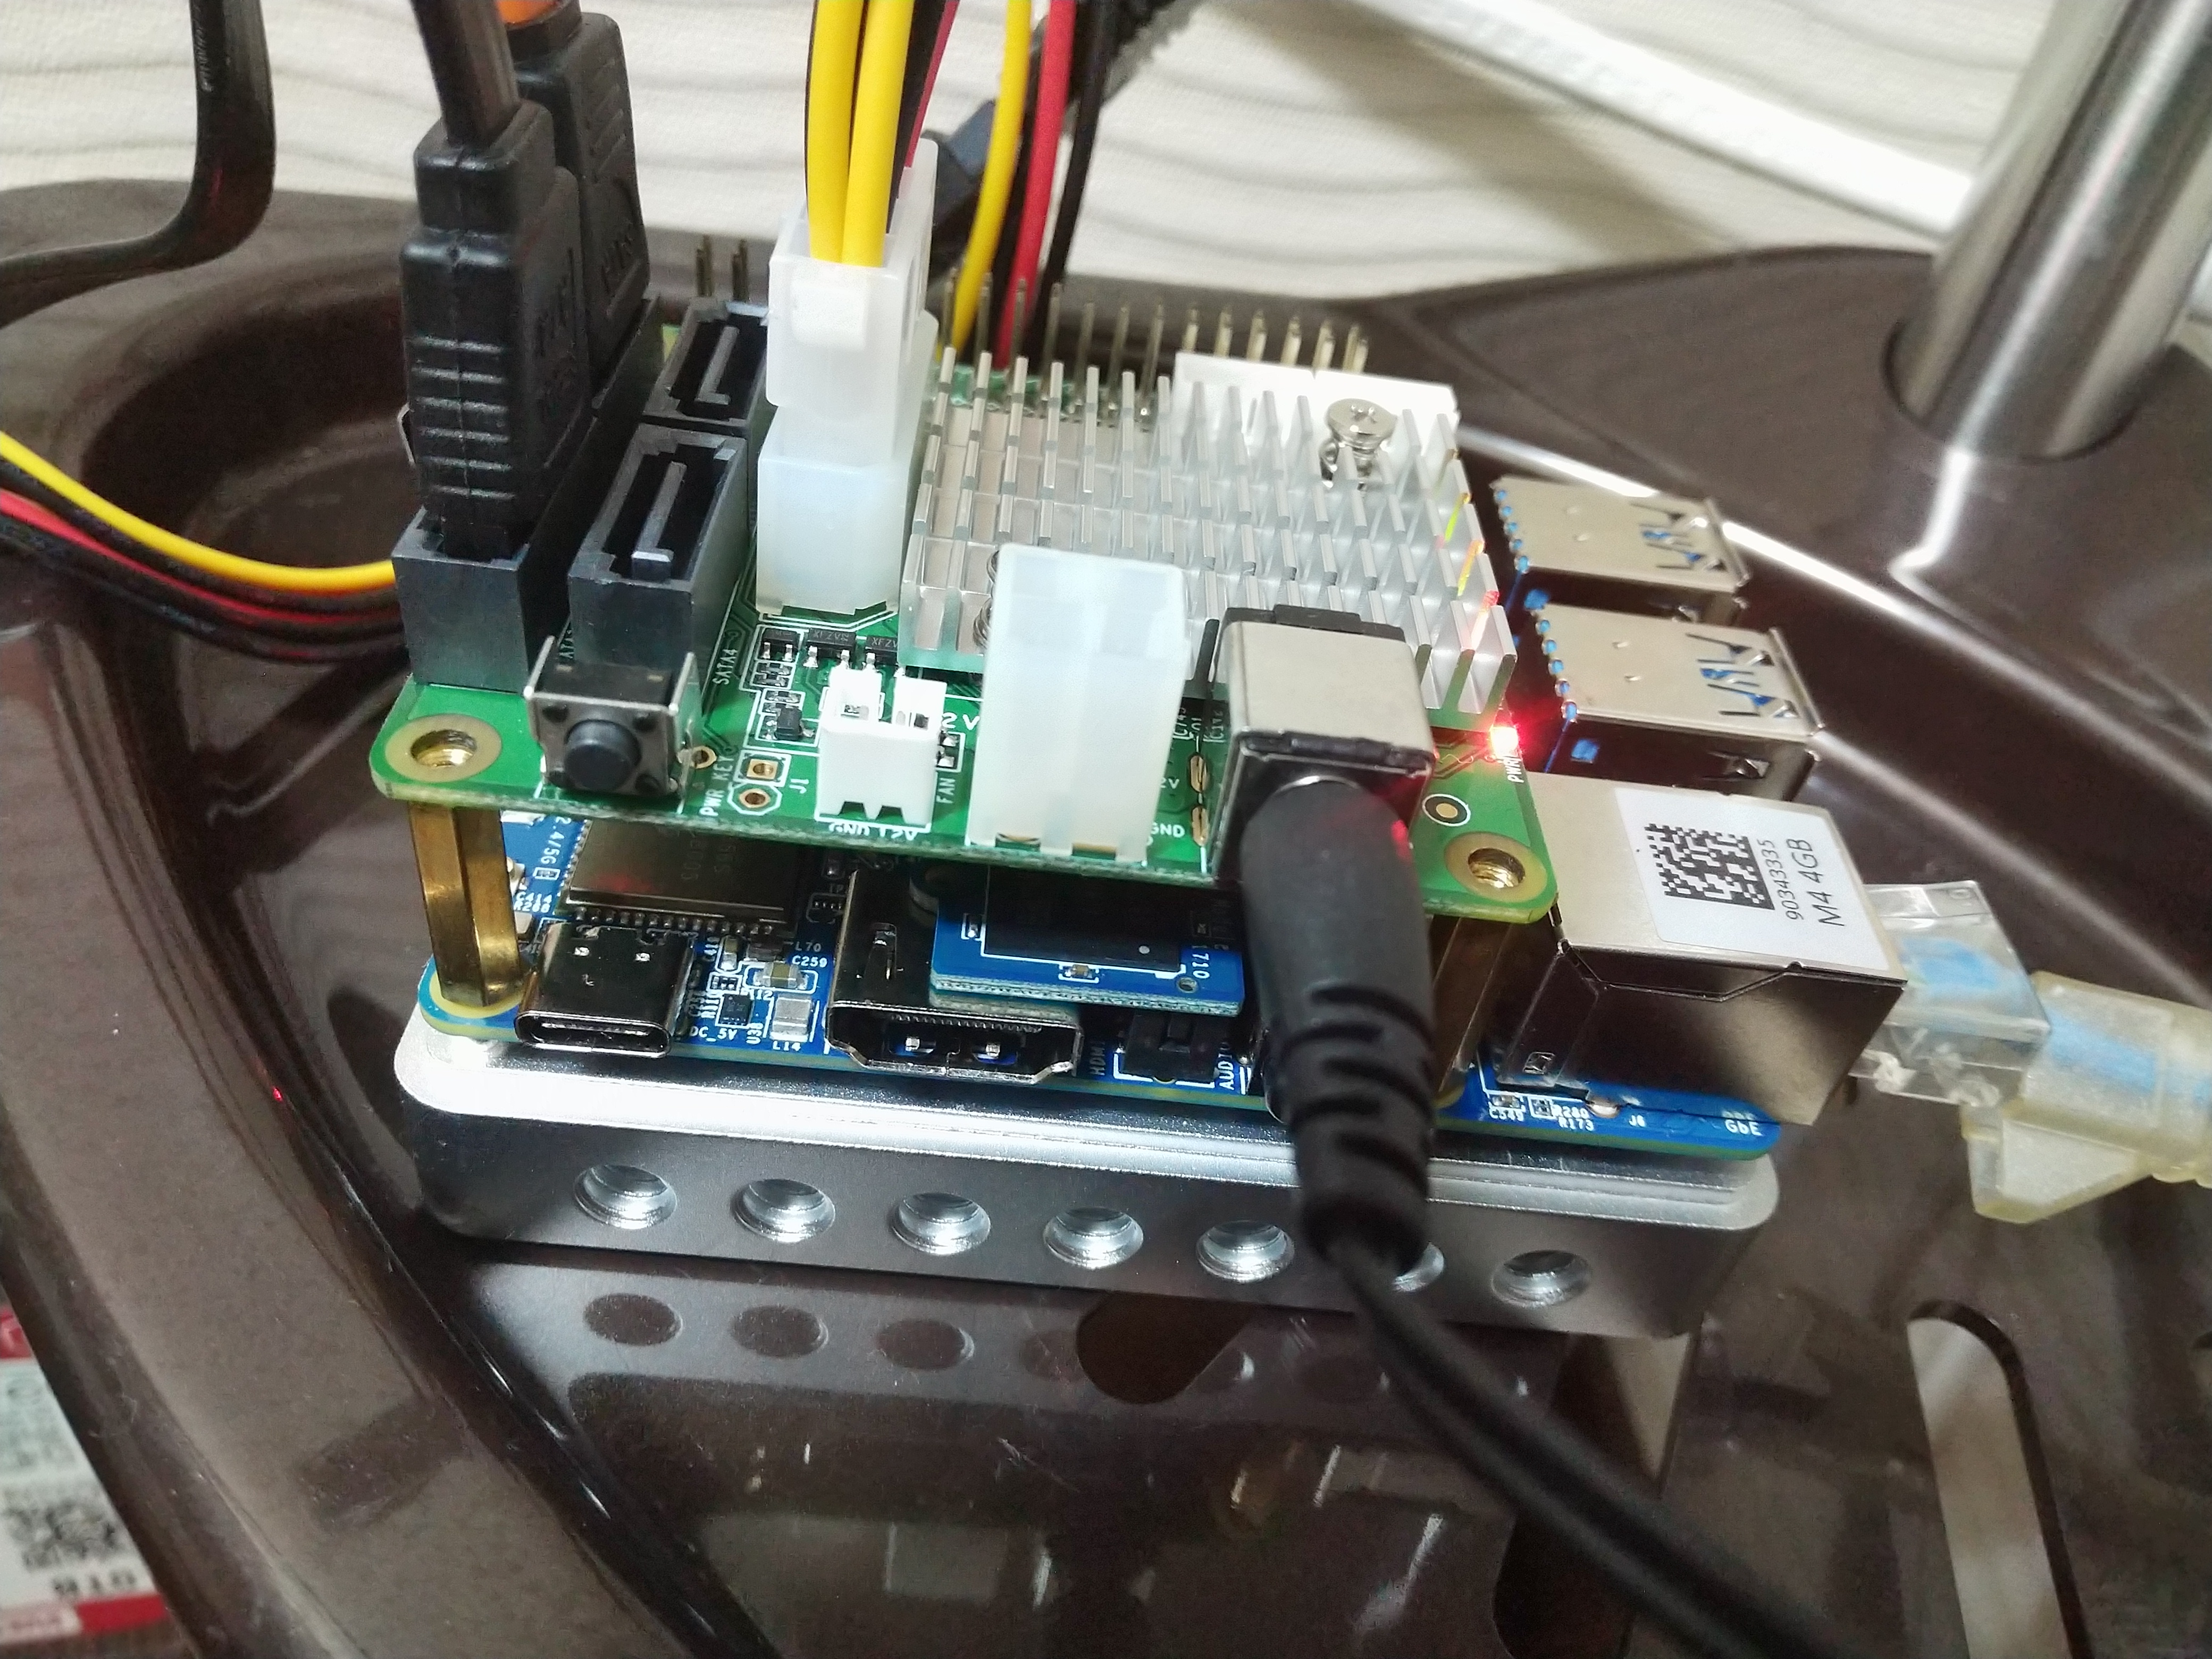
Assembling
I seem assembling is easy relatively.
It is necessary to set a pad over RK3399 chip before attaching heatsink.
Attaching eMMC is required before setting a SATA hat.
OS
At 6/15, I found seven OS supported Nanopi M4, and only three OS can use SATA hat officially.
But I had found I can use another OS to use a SATA HAT.
https://forum.armbian.com/topic/10011-nanopi-m4-sata-hat/
Armbian also can handle SATA HAT. so I chose Armbian because I wanted to use general distribution.
Installing Armbian
Writing to SD
https://www.armbian.com/nanopi-m4/
I confirmed I could use a SATA HAT in both Stretch and Bionic.
I downloaded a Stretch distribution and I wrote this to SD card by Balena Etcher.
Boot from SD card
In the end, Nano Pi M4 is booted by eMMC, so SD card is used as a install media.
First, Insert SD card and power on, boot from SD card.
Second, Armbian shows a prompt for root login so input username(root) and password(Armbian default:1234)
Finally, Armbian shows a prompt of registration a normal user, so input user account information you use.
If it is finished, You have already logined as root account.
Installing Armbian to eMMC
If you logined, input this command for installing Armbian to eMMC.
$ sudo nand-sata-install
Then Armbian will display a menu to select the destination media, so select “Boot from eMMC - System on eMMC”
Soon, It appear warning message(in red text), select “Yes”. And wait to finish installation.
if it finished, it shows a dialog for power off, so choice power off, remove SD card and reboot.
If it works well, Nano Pi M4 boot by eMMC.
Installing file shering server and DLNA server
If you get here, You can install server service as same as another linux distribution.
After network configuration, do it.
A trap of OpenMediaValut
There was a option to install OpenMediaVault if I use this board as a simple NAS.
https://www.openmediavault.org/
Unfortunately, it was unstable when I used it in this board.
I think a OpenMediaValut has a trouble because when I used a samba alternatively, it was so stable.
It may not occur this trouble now, I have used samba only.
(2019/9/18 update)
I have received a report that OMV have worked in this environment.
@dimeiza just read your blog post on NanoPi M4 - I have a similar setup but OMV is working for me. Thanks for sharing!
— ImpatientMaker (@ImpatientMaker) September 17, 2019
If you will make this NAS from now, you can try to use OMV.
Installing Samba
I don’t introduce this because there are many example in the internet.
Installing DLNA server
Usually, these case it is used minidlna(Readymedia) because performance of single board is poor relatively.
https://wiki.archlinux.jp/index.php/ReadyMedia
But I didn’t satisfy functions of minidlna, I wanted to use a function of transcoding.
Therefore I used a Serviio. It seems this product is implemented by Java, and it seems heavy more than minidlna, But Nano Pi M4 has over twice performance as Raspberry Pi 3, so I decided to use it.
I have installed serviio, and I seem all function works well.
Assembling a RAID (procedure only for me)
I operated above operation with an external 2.5 inch HDD.
But 2.5 inch HDD has only a poor performance. I want to use 3.5 inch HDD, so I decided to use HDDs used old NAS.
I had used these HDD as RAID1 HDD. I had knew a file system of readyNAS raid is btrfs, so I used mdadm to assemble RAID1 over the Nano PI M4.
installing mdadm and assembling RAID1
First, I connected old HDD to Nanopi M4 and installed mdadm to use software RAID.
$ sudo apt install mdadm
Second, I tried to assemble RAID 1.
A HDD of ReadyNAS RAID has three partition, and actual data is written in partition 3.
sudo mdadm —assemble /dev/md127 /dev/sda3 /dev/sdb3
Finally, run RAID1.
sudo mdadm -R /dev/md127
mount and fstab
In this state, I executed this command to mount a RAID1 volume.
sudo mount /dev/md127 /nas
And changed owner,
sudo chown [username]:[groupname] /nas
In this state, I succeeded to share files under /nas folder by samba and serviio.
Finally, I edited /etc/fstab to mount during boot.
/dev/md127 /nas btrfs defaults 0 0
I configured it to mount as btrfs file system. And I have confirmed auto mount is successful.
Result
Cables are still mess a little.
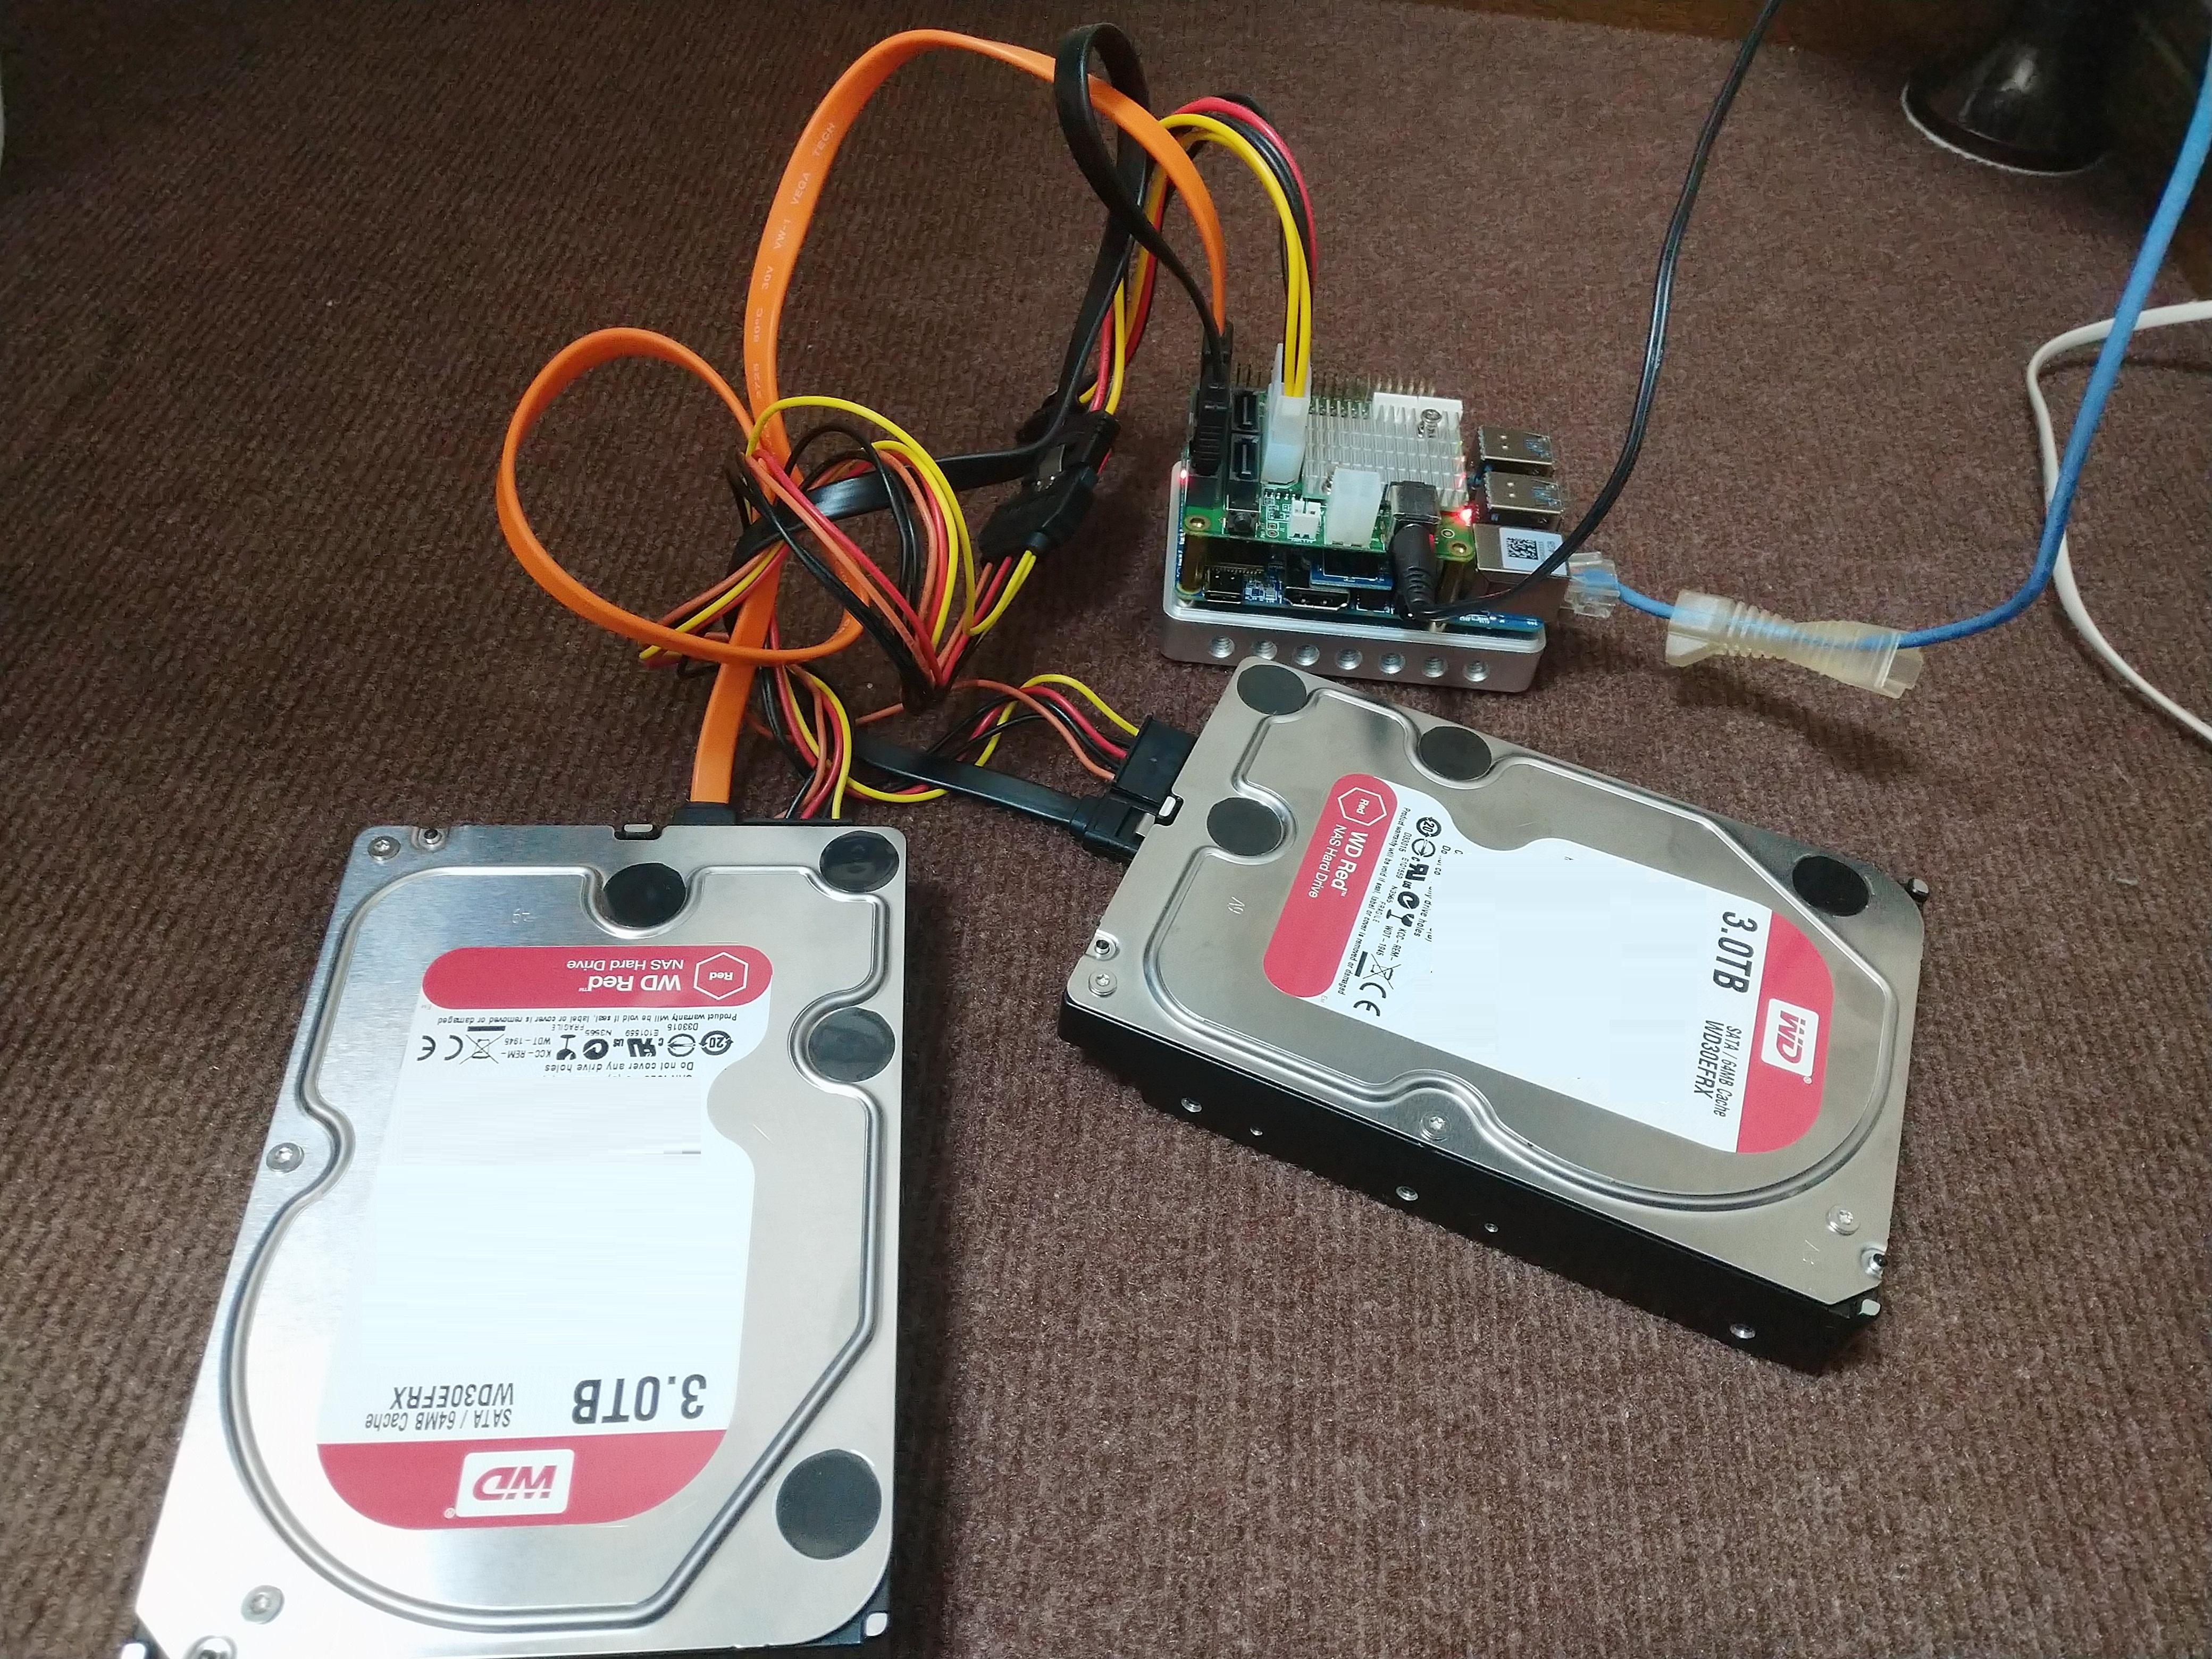
This NAS system can operate fanless and smaller than old NAS therefore I can flexibility choice a place to set it.
I will consider a protection against physical impact of HDD.
Conclusion
I have got a lot of valuable knowledge during this try. And My curiocity gave me a practical NAS device.
If you have a some Linux knowledge, and you want to know devices beyond a Raspberry Pi, This try probably is useful for you.