Today I introduce a bit of pc customize technique with famous mini-ITX case.
I decided to publish this method because I seem this know-how isn’t popular.
Introduction
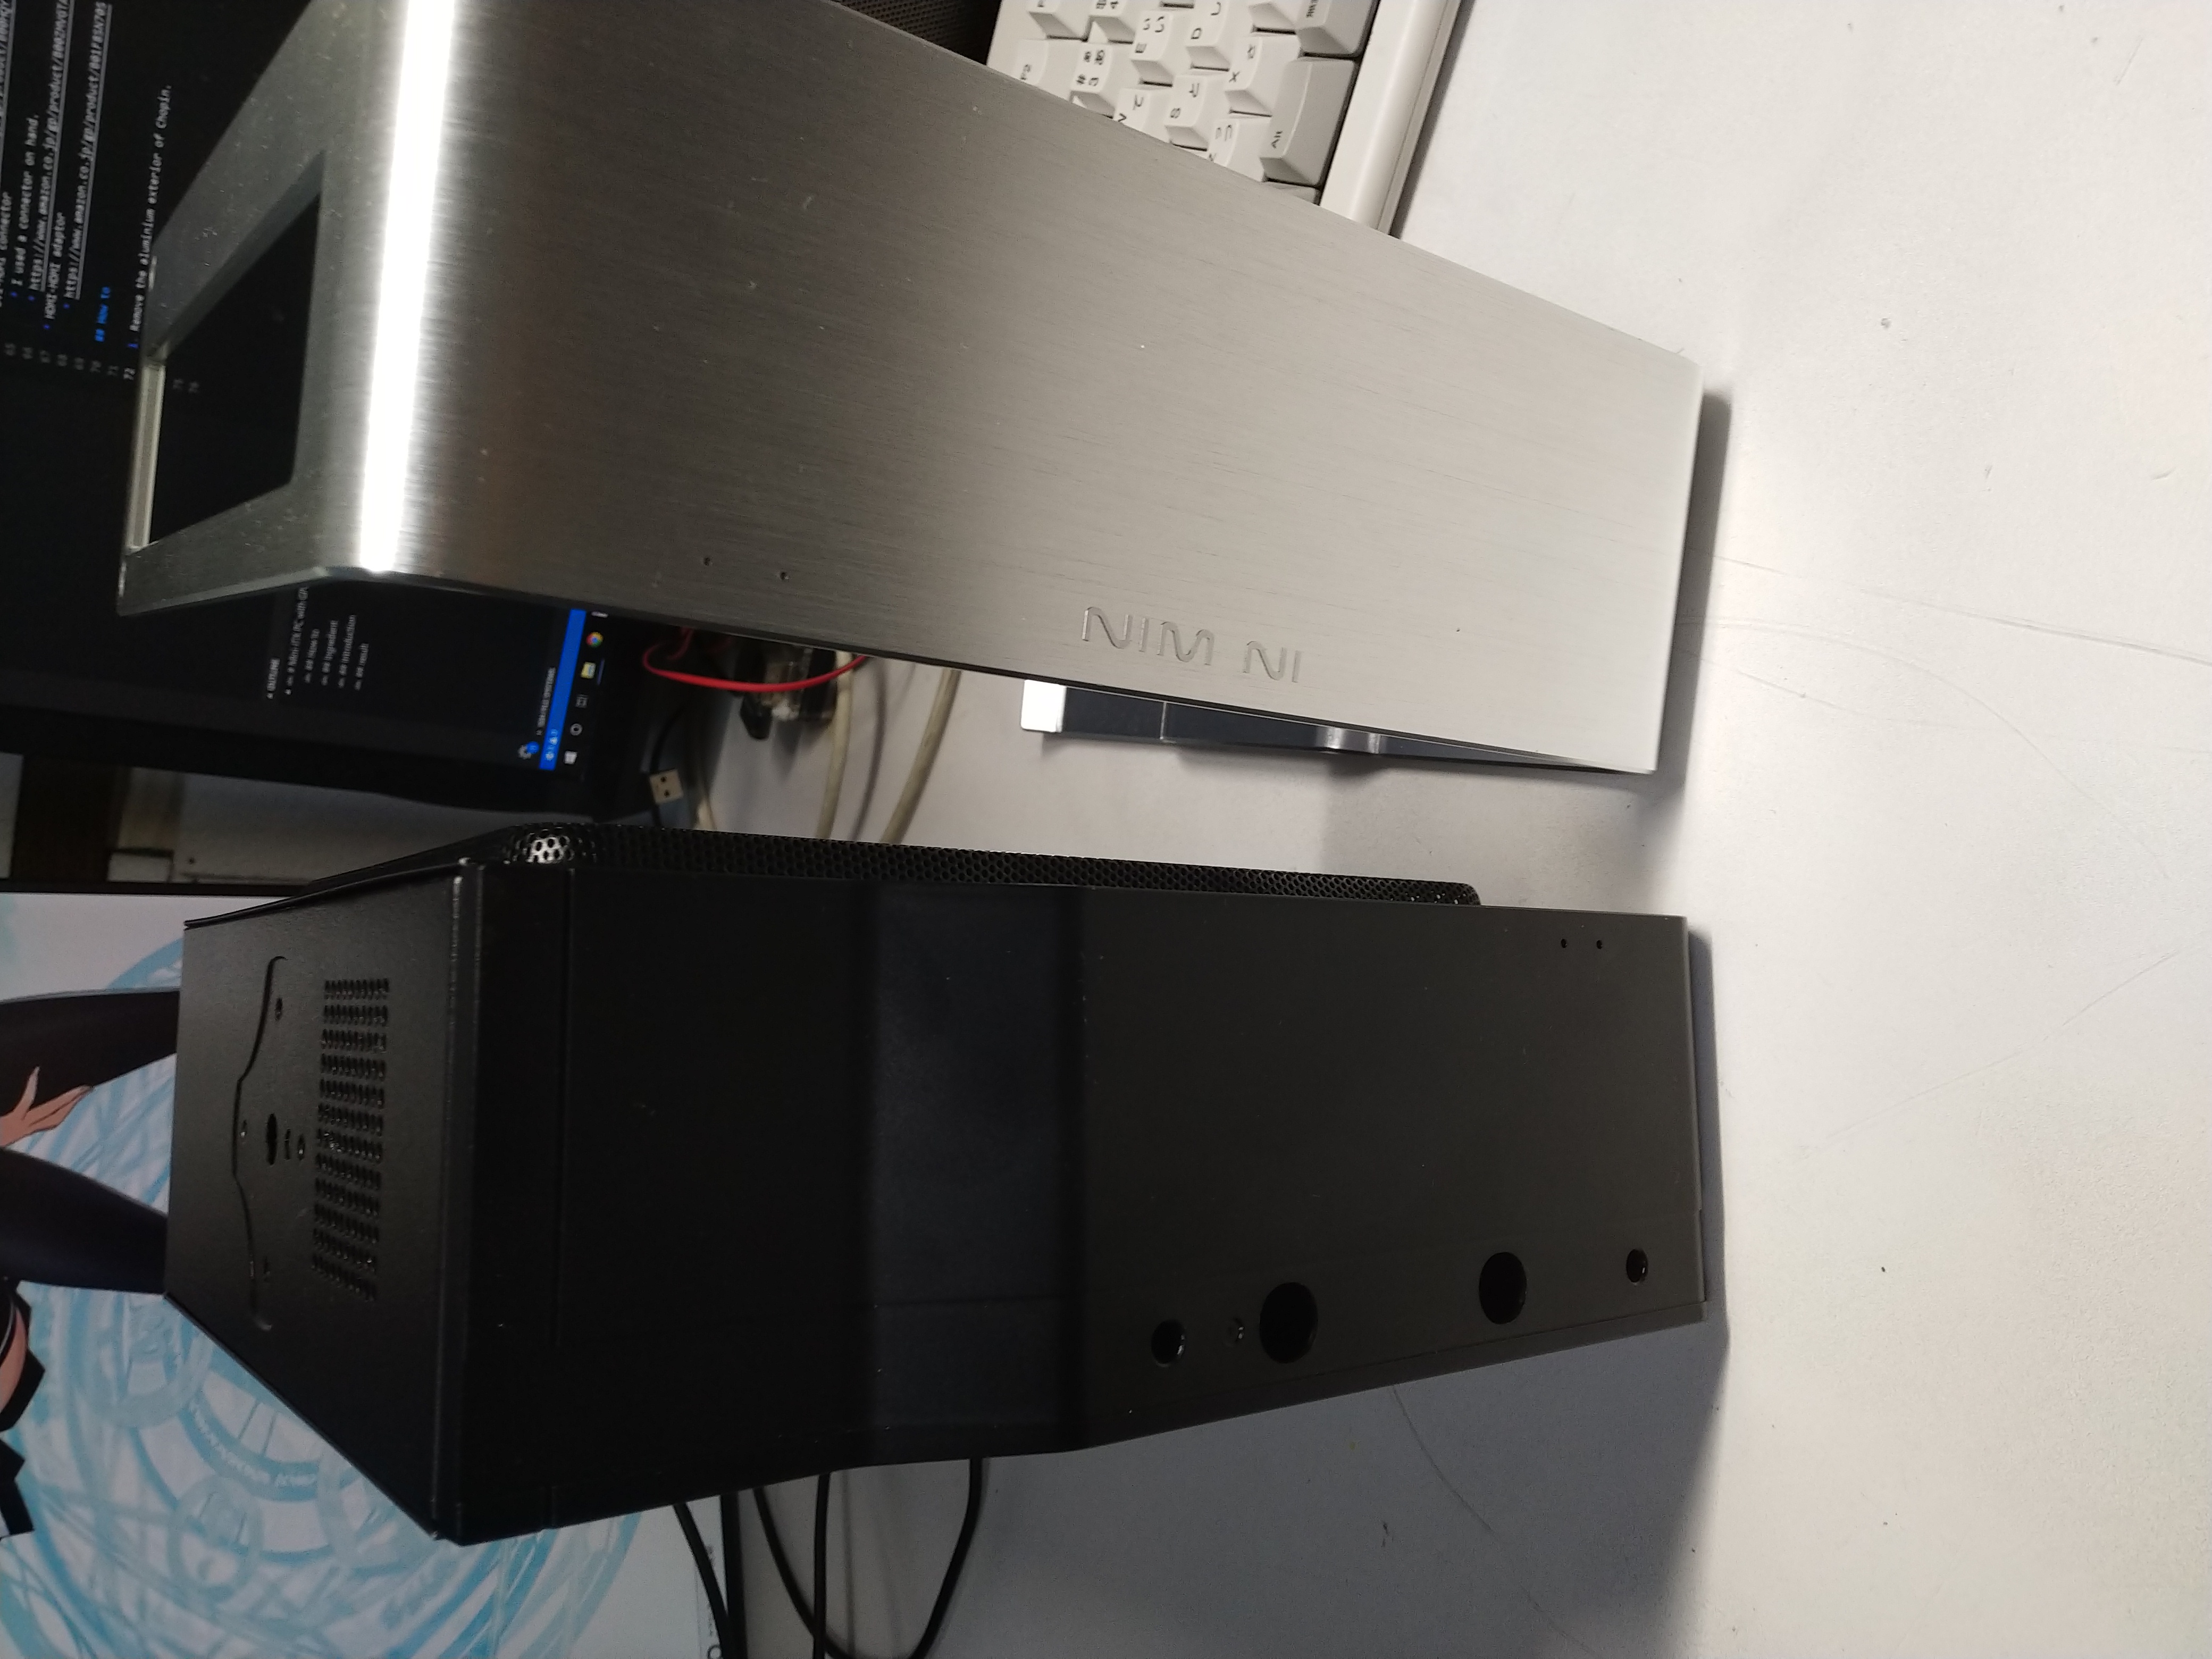
I have a famous mini-ITX case made by In Win. Chopin.
This is my favolite case.
But my main PC(Ryzen 7 1800X) has been built with DAN cases A4-SFX(It also be awesome case!). Therefore Chopin was used for building a 2nd PC.
Recently I heard a good news. Zen2.
When I heard this news, I hoped to buy a Ryzen9 3900X.
If I buy Ryzen9 3900X, I have to think a position of CPU of now main PC(Ryzen 1800X).
Ideally, I thought a good it is suitable for 2nd PC.But Ryzen7 1800X doesn’t have a GPU core and Chopin can’t use GPU.
I don’t want to buy another case. On the other hand, one user invented awesome technique (can use more powerful GPU).
https://forums.bit-tech.net/index.php?threads/inwin-chopin-gpu-1050-ti-mod-pluto.347849/
But this requires me some metal handywork skill. And I don’t have it.
For above reasons, I needed a solution without a customized case.
Result
I thought.
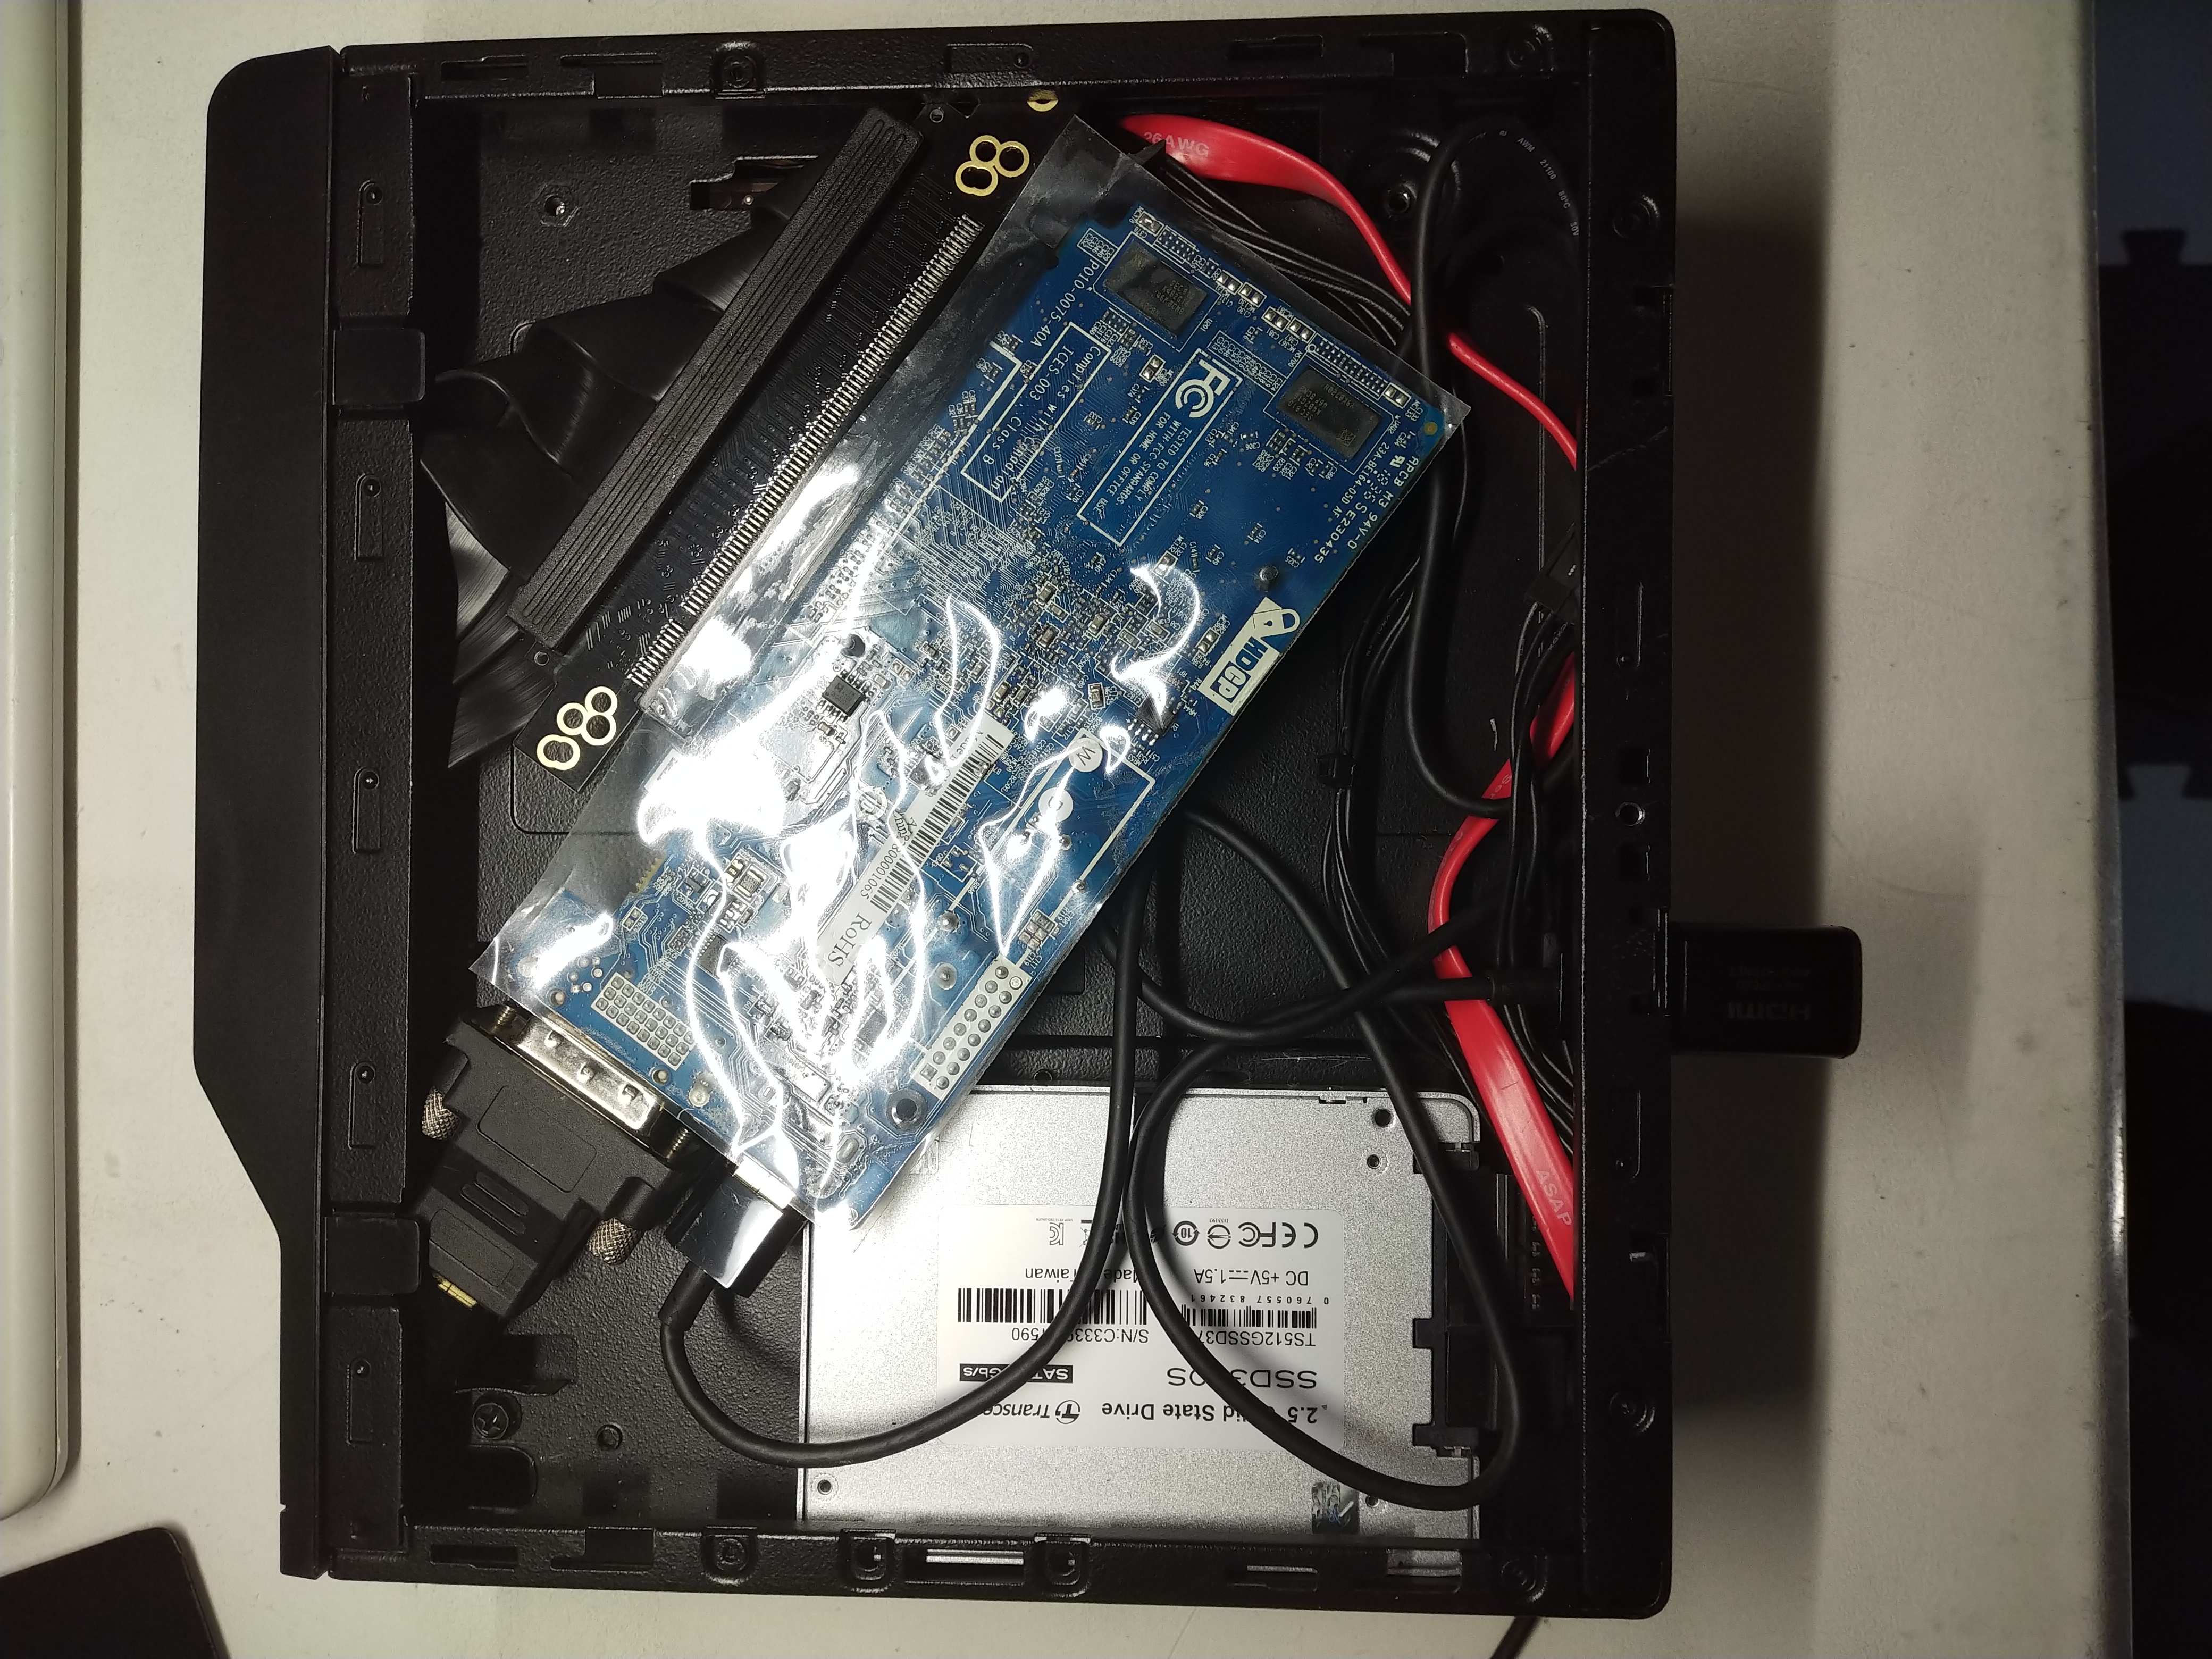
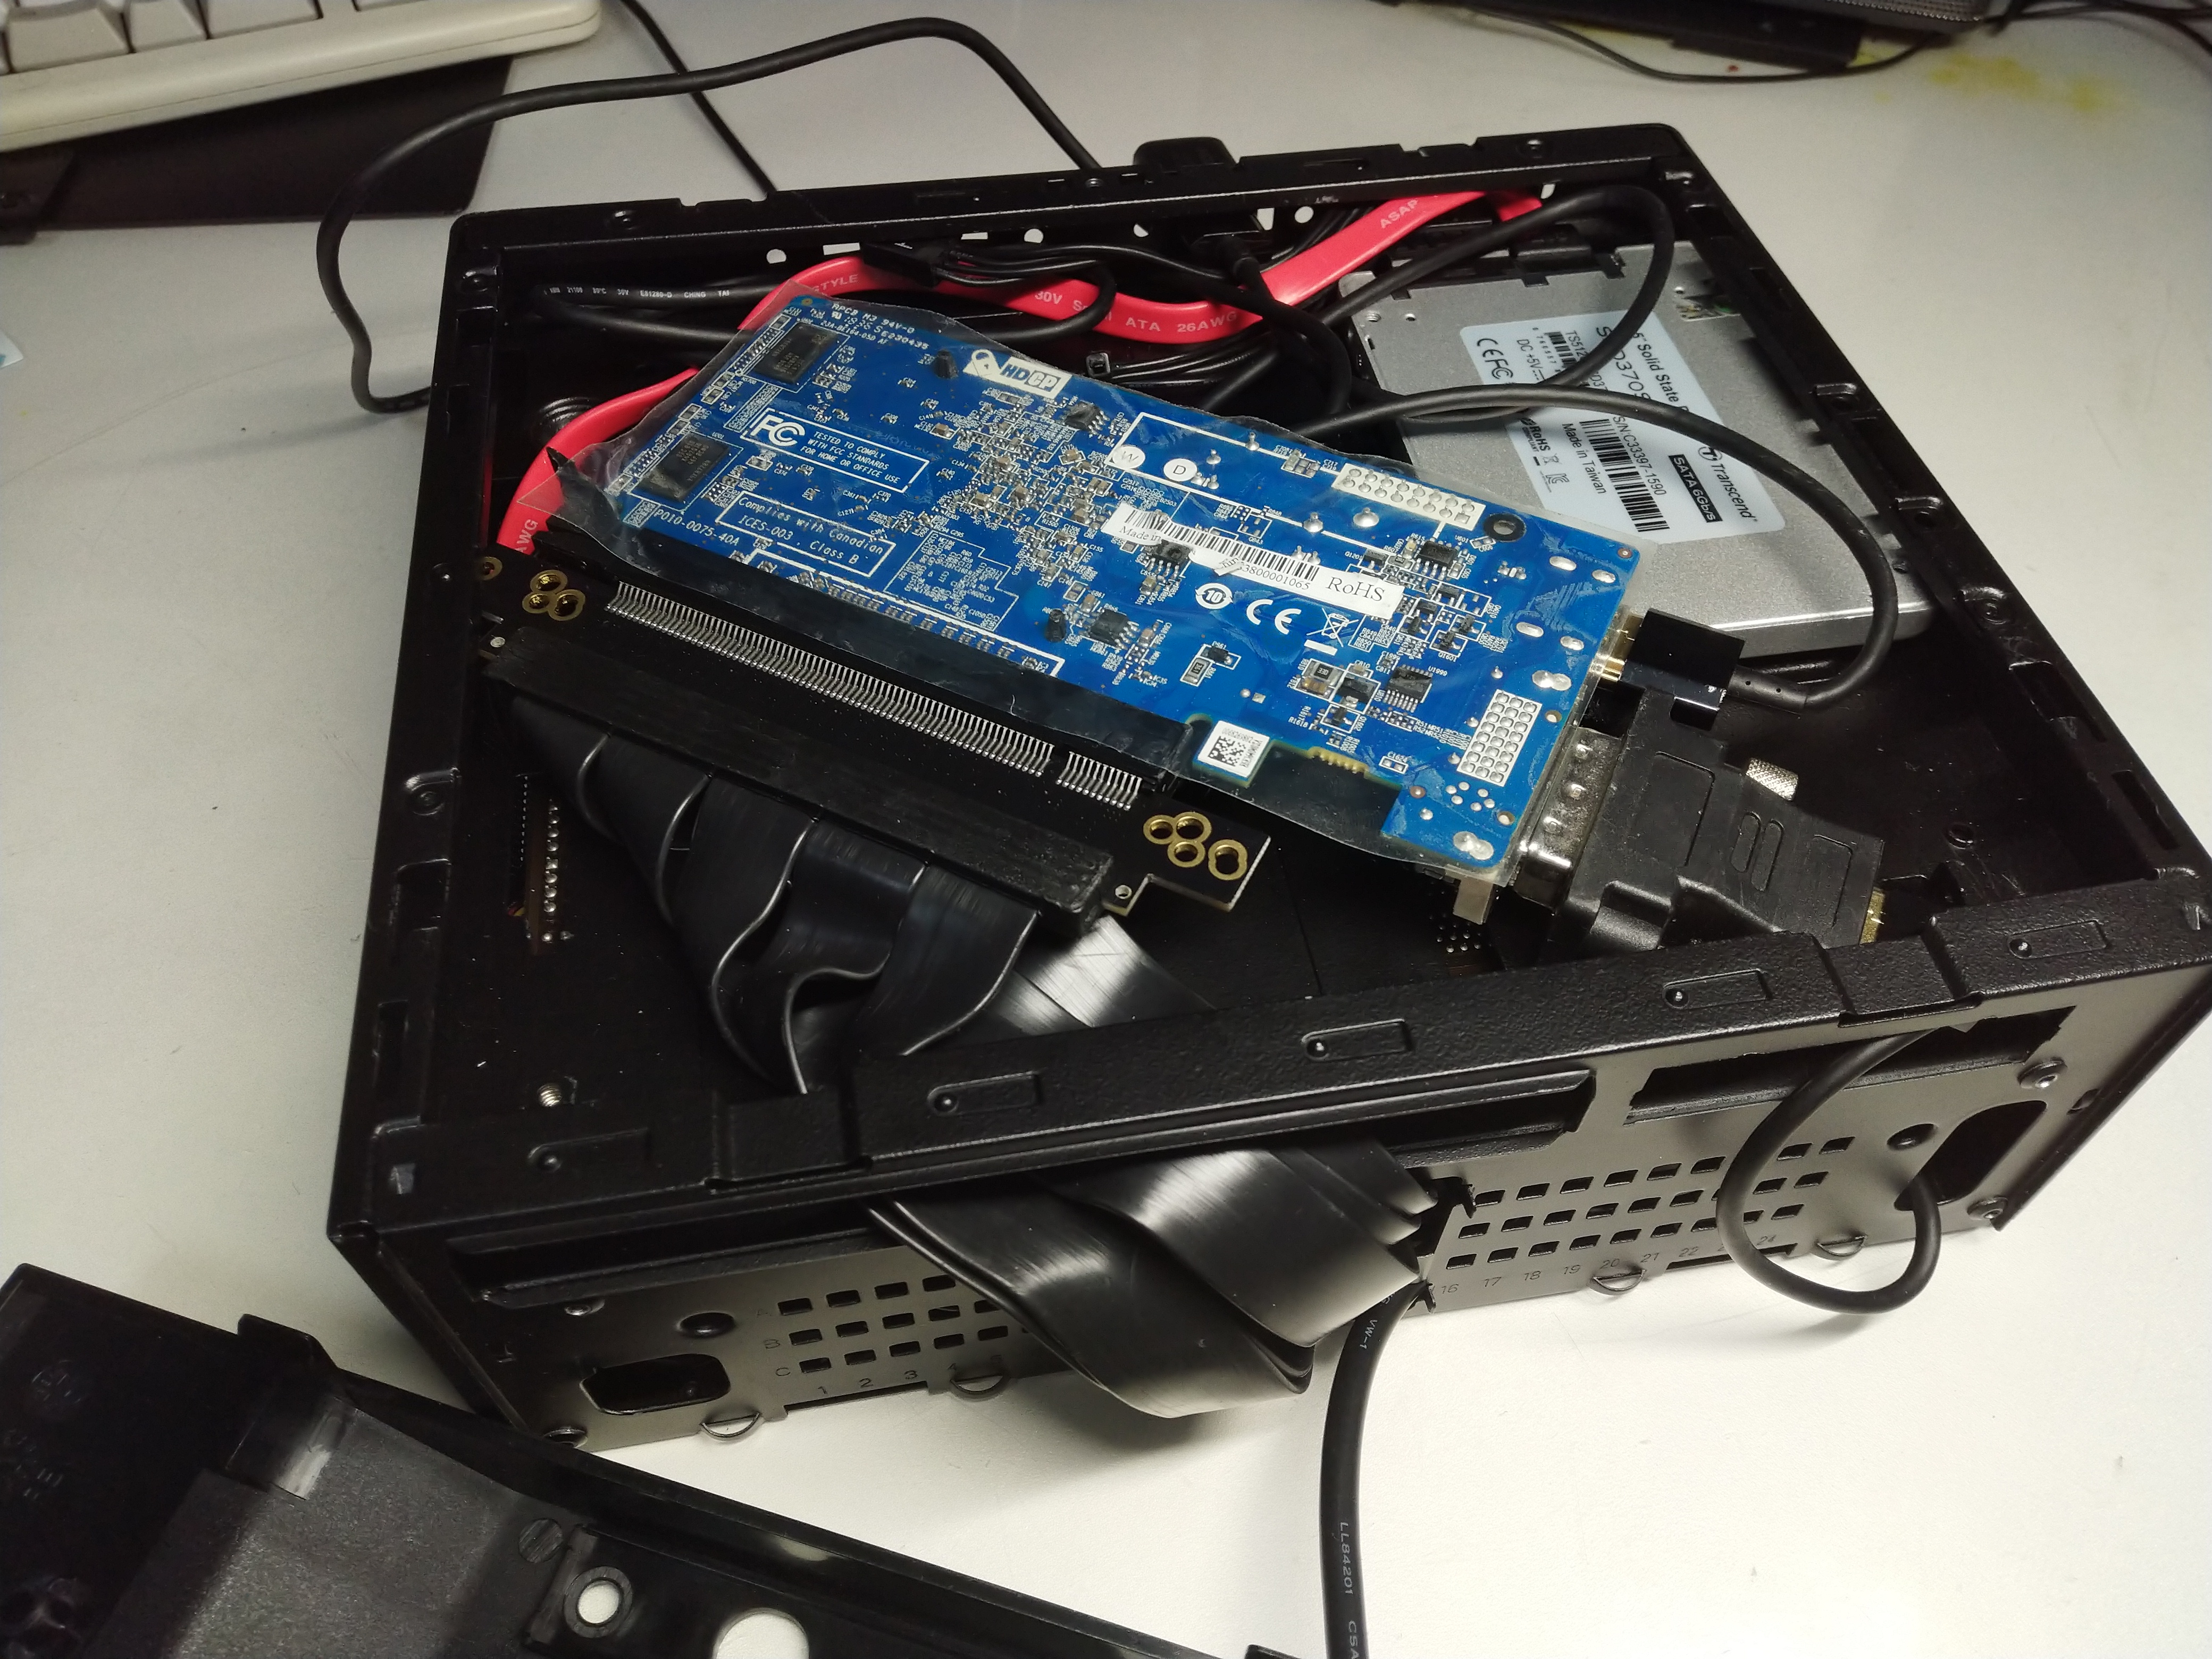
Isn’t the space of 2.5 inches of storage able to accommodate a low profile GPU board? And Isn’t riser cable able to connect GPU slot of motherboard and storage space? So I tried this. And succeeded.
Storage Space(with insulation sheet removed):
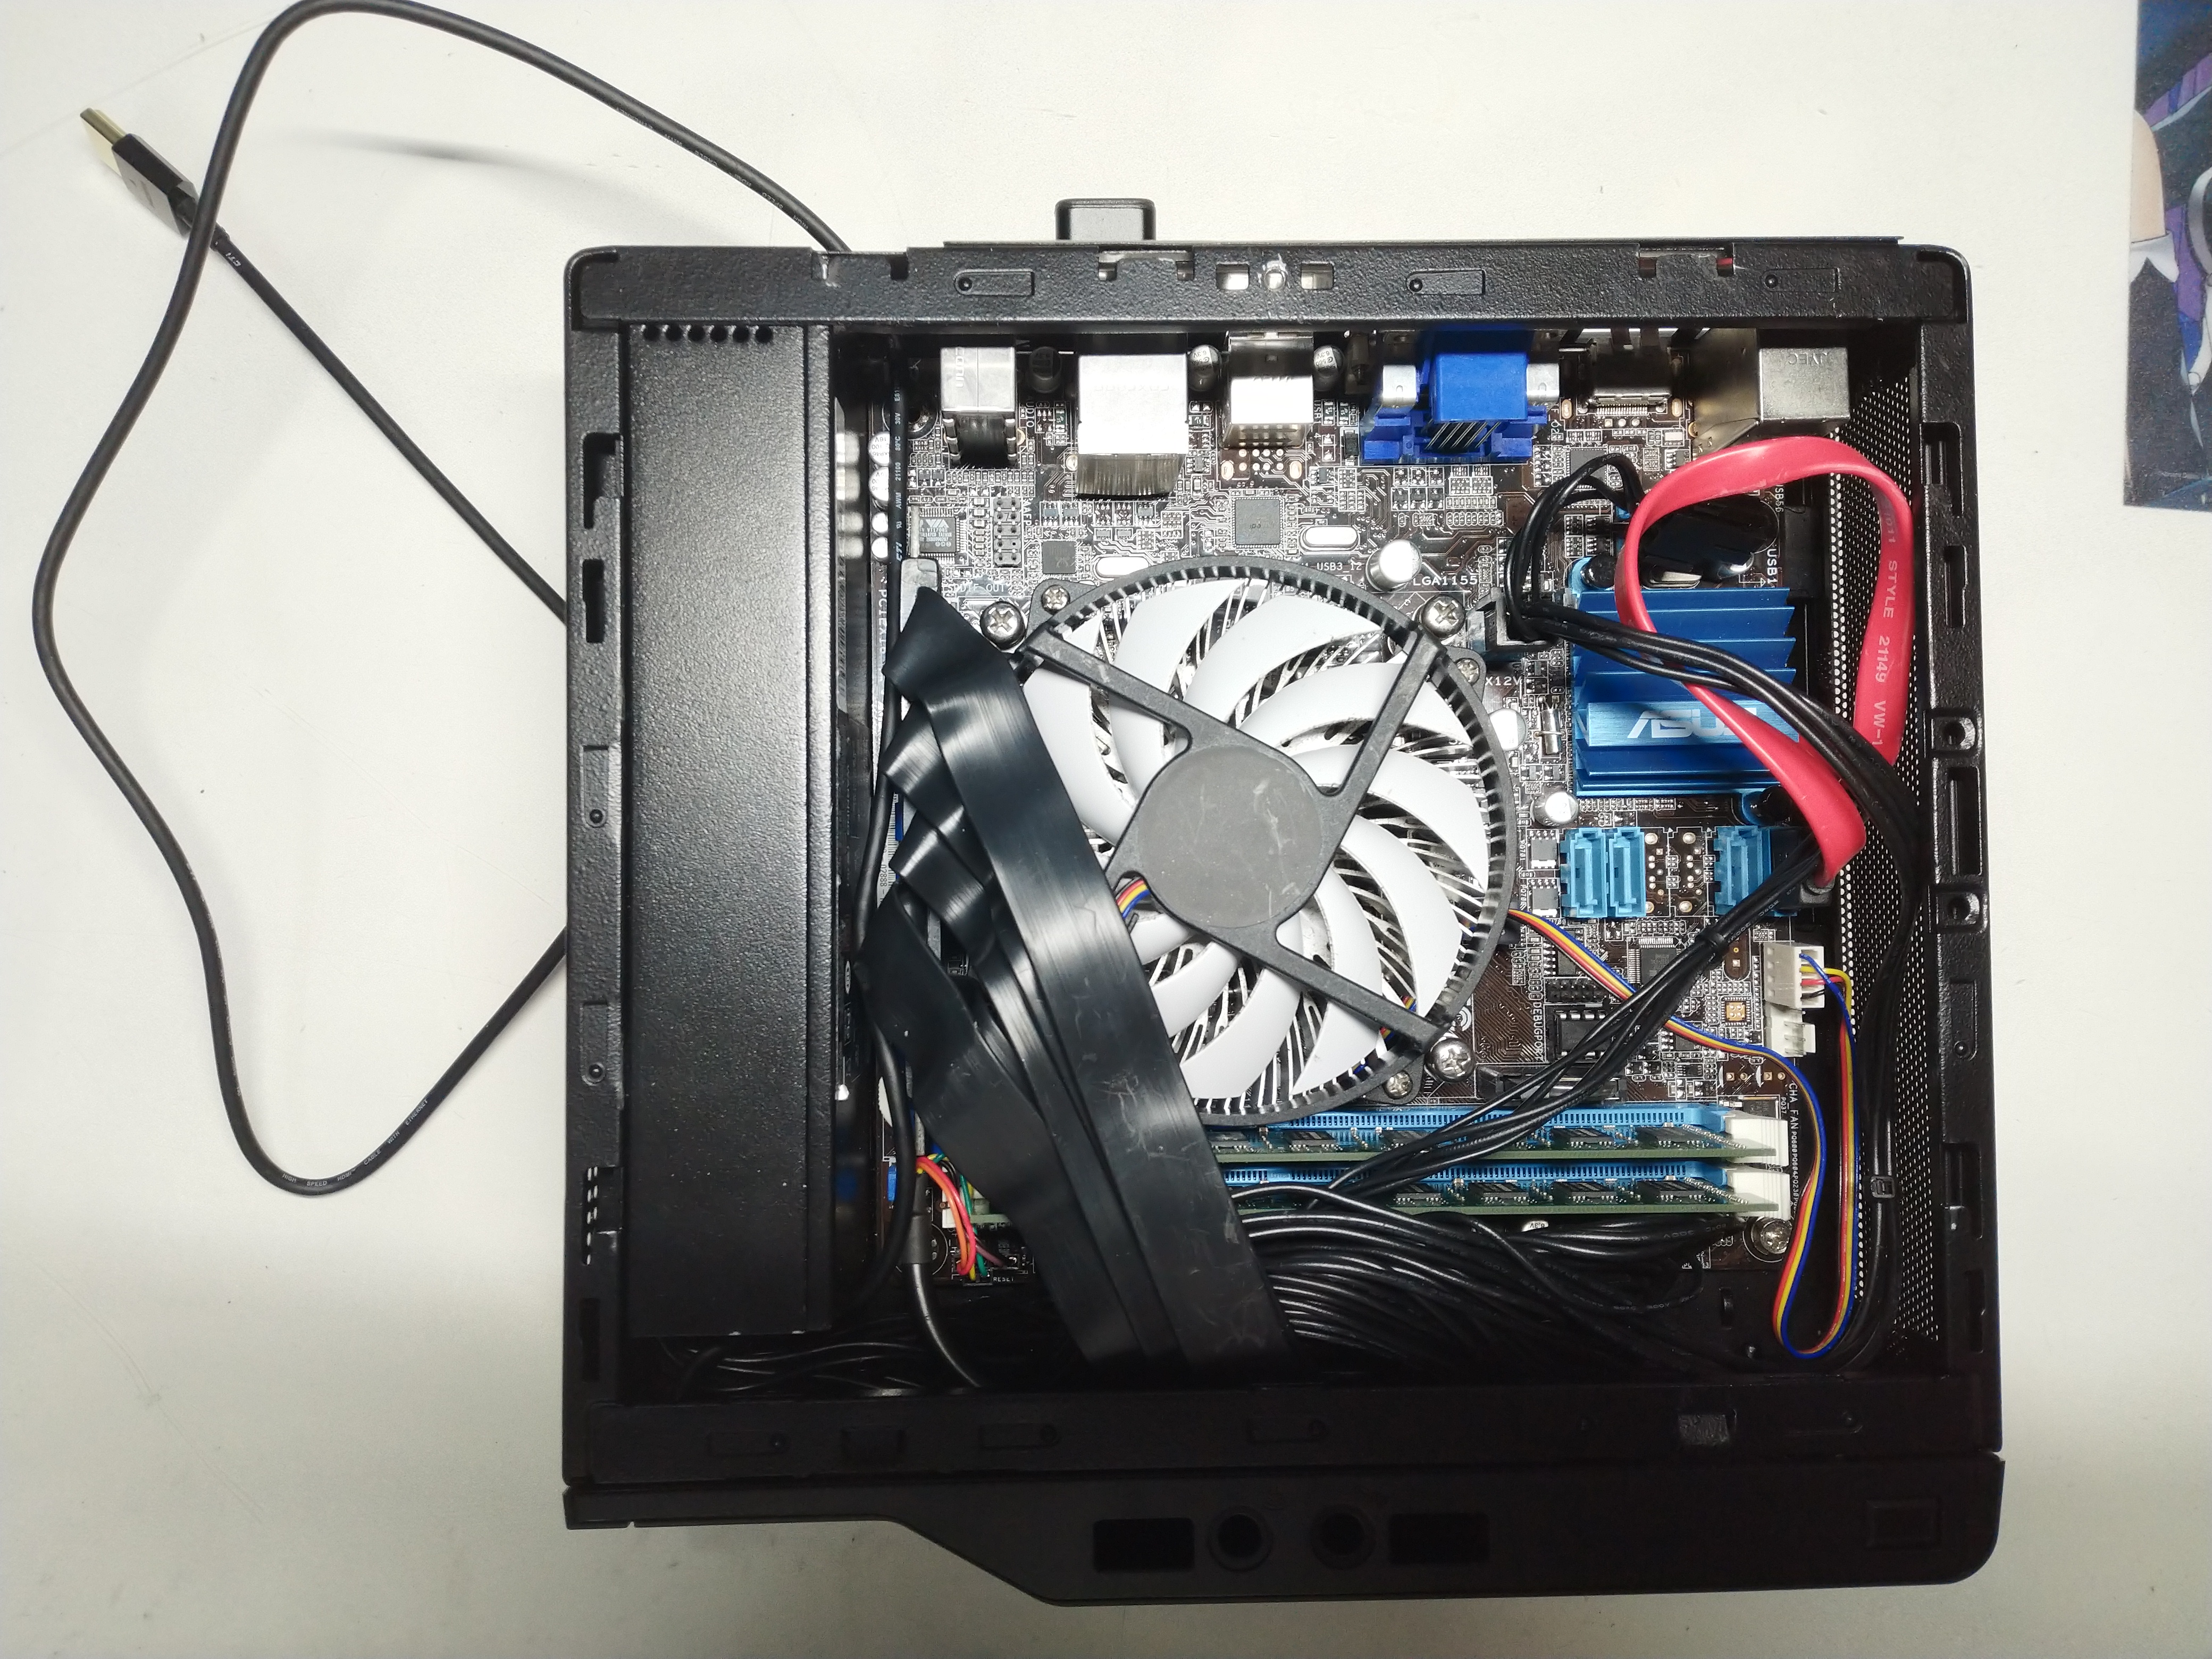
Motherboard space:
Yesterday, I started this PC and confirmed that it works properly.
Ingredient
GPU
It is most thin GPU board I found.
Rizer cable
Good flexibility. it is probably good if it is more little longer.
HDMI Thin cable * 2
Elecom High speed HDMI cable This item mainly be used in Japan, so you may can’t get it easily.
Amazon.com sells this item, and probably you can get an equivalent item.
It is critical HDMI cable is slim and connector is small. Don’t compromize this point.
DVI-HDMI connector
I used a connector on hand. Like this.
HDMI-HDMI adaptor
I used this. https://www.amazon.co.jp/gp/product/B01F8SN70S/
But if you live in other country, you can get an equivalent item. Like this.
How to
1.Remove the aluminium exterior of Chopin. Like this.
This exterior is screwed with T15 screw so you have to prepare suitable screw driver.
2.Remove side panels and plastic front panel.
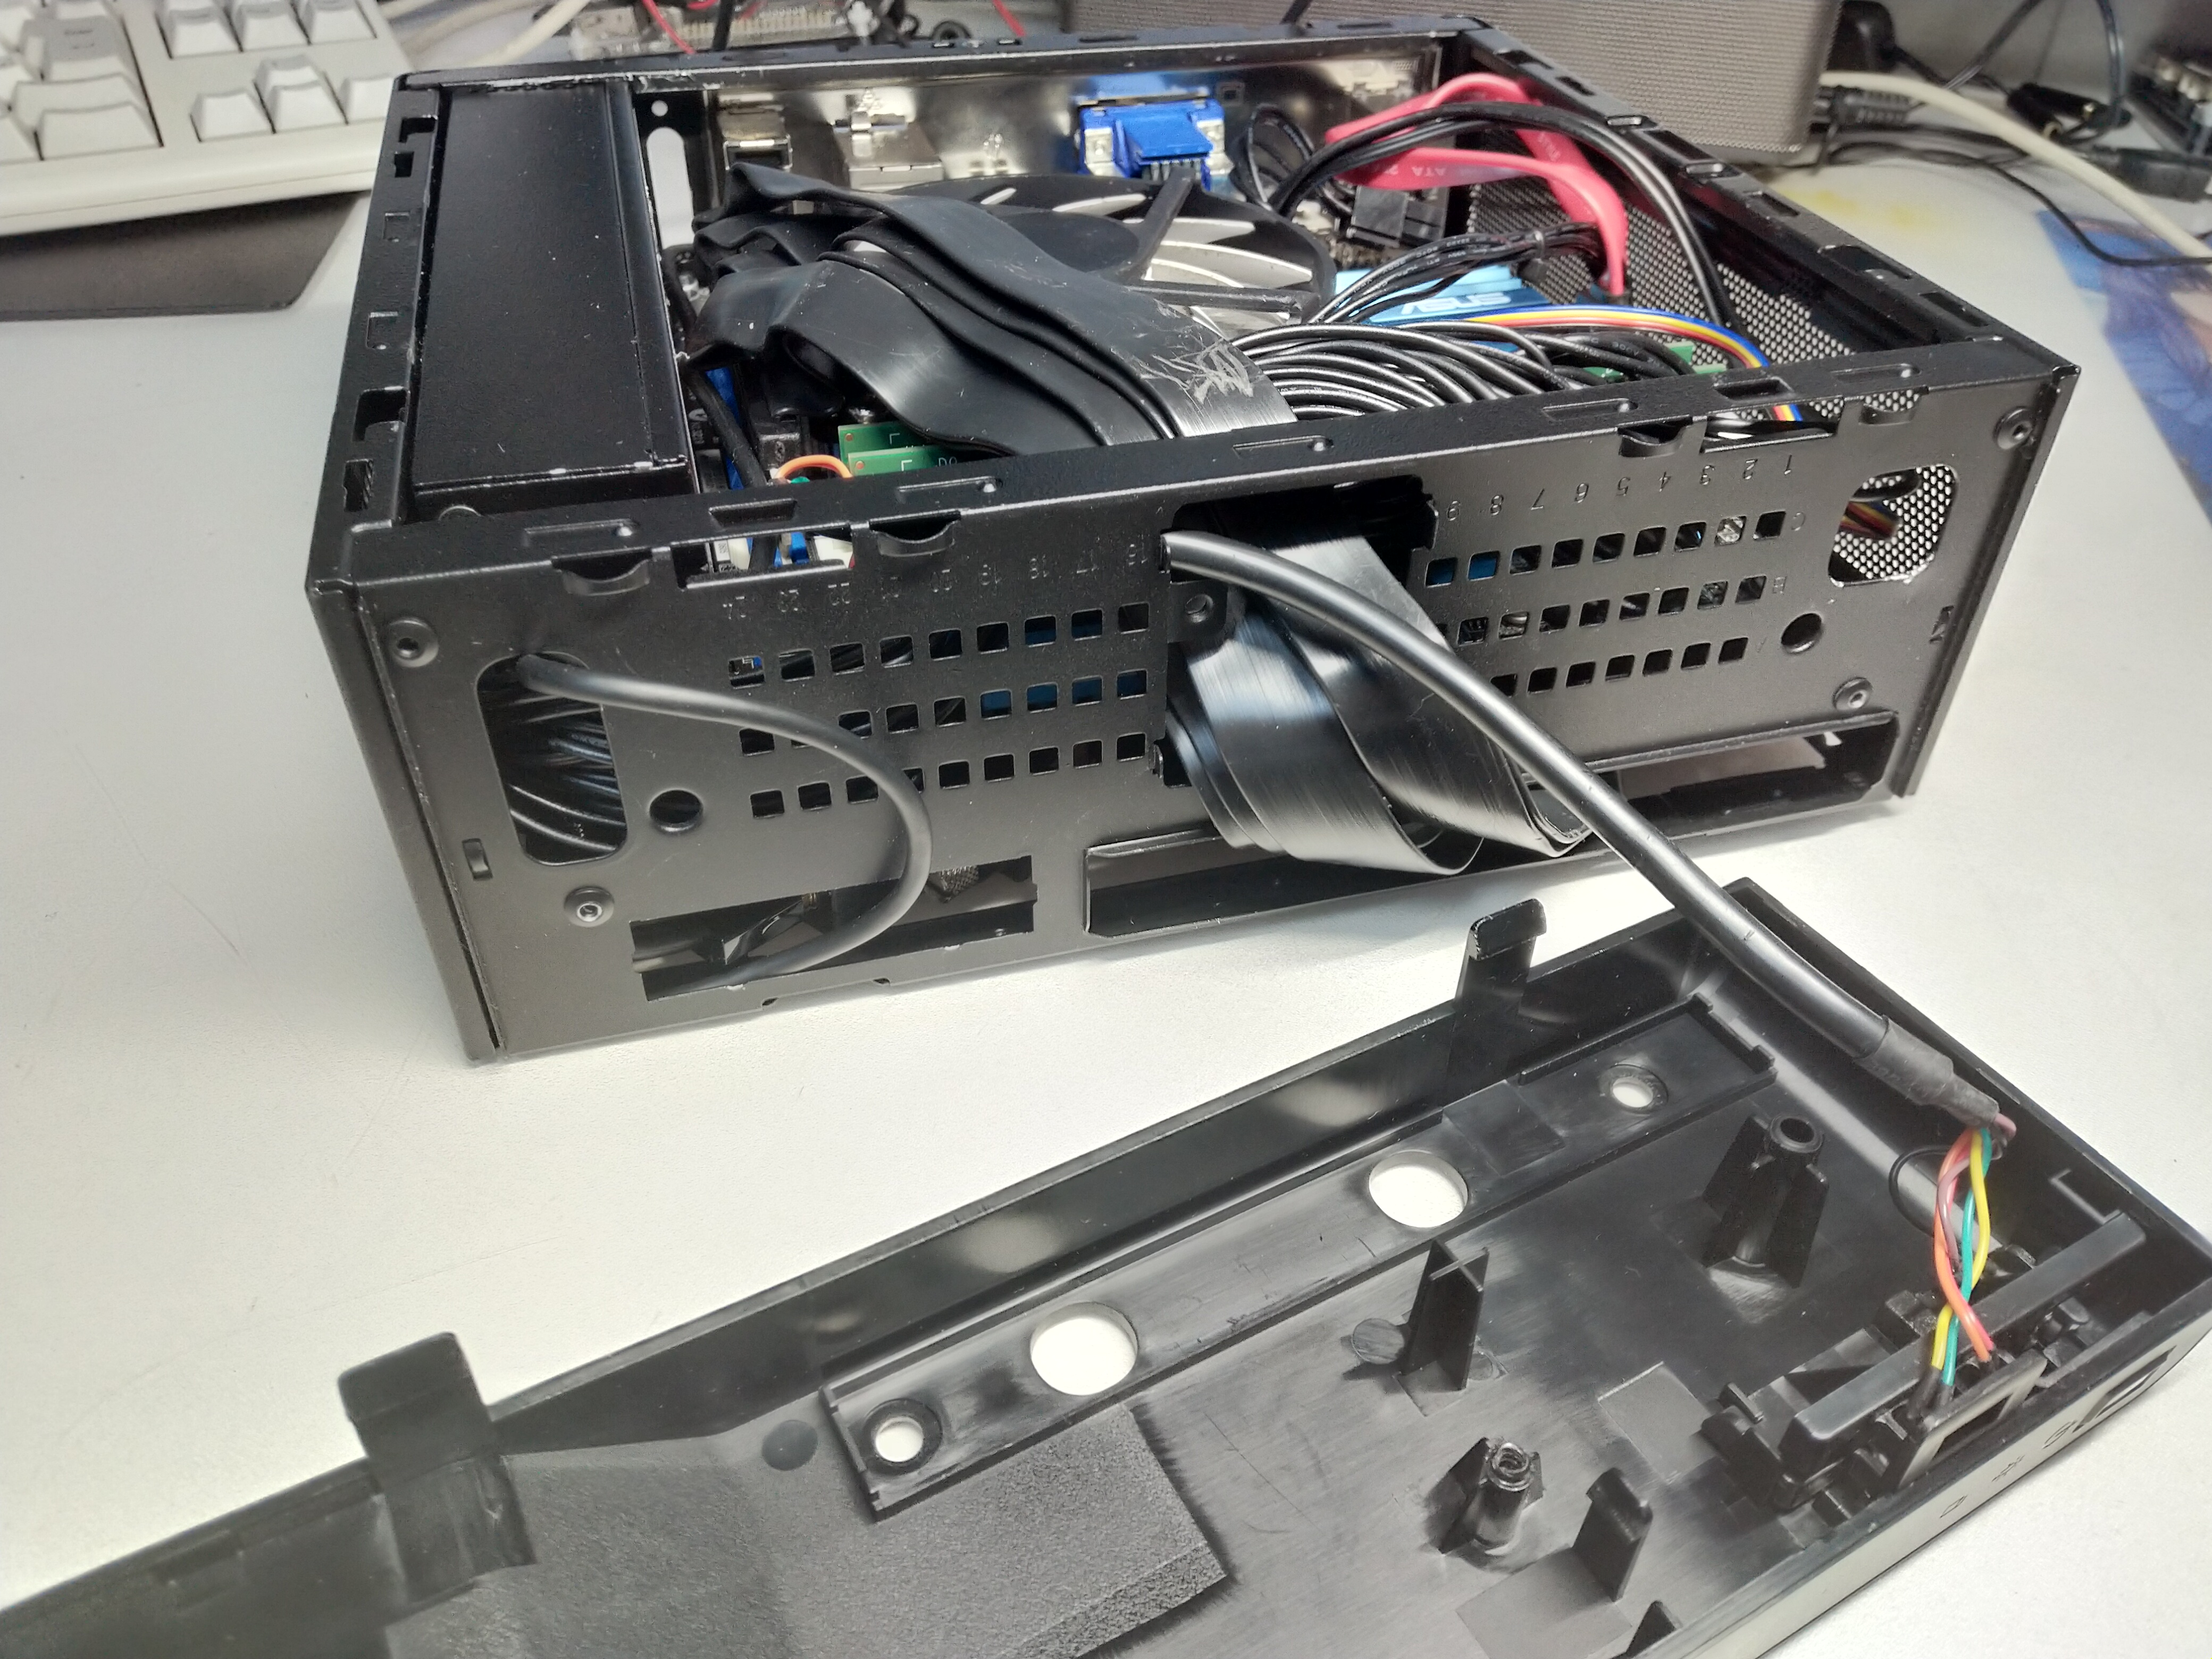
If you remove, You can see 5 hole in front plate like this picture.
Remove a interface board (USB + audio) that attach front panel. 4.Plug the riser cable into the PCI Express connector.
5.Thread the other connector through the center hole.
6.Connect GPU to connector , and insert GPU to storage space.
7.Connect DVI-HDMI connector to GPU DVI port.
8.Connect HDMI cables to GPU HDMI port and DVI-HDMI connector. Then GPU can output 2 HDMI lines now.
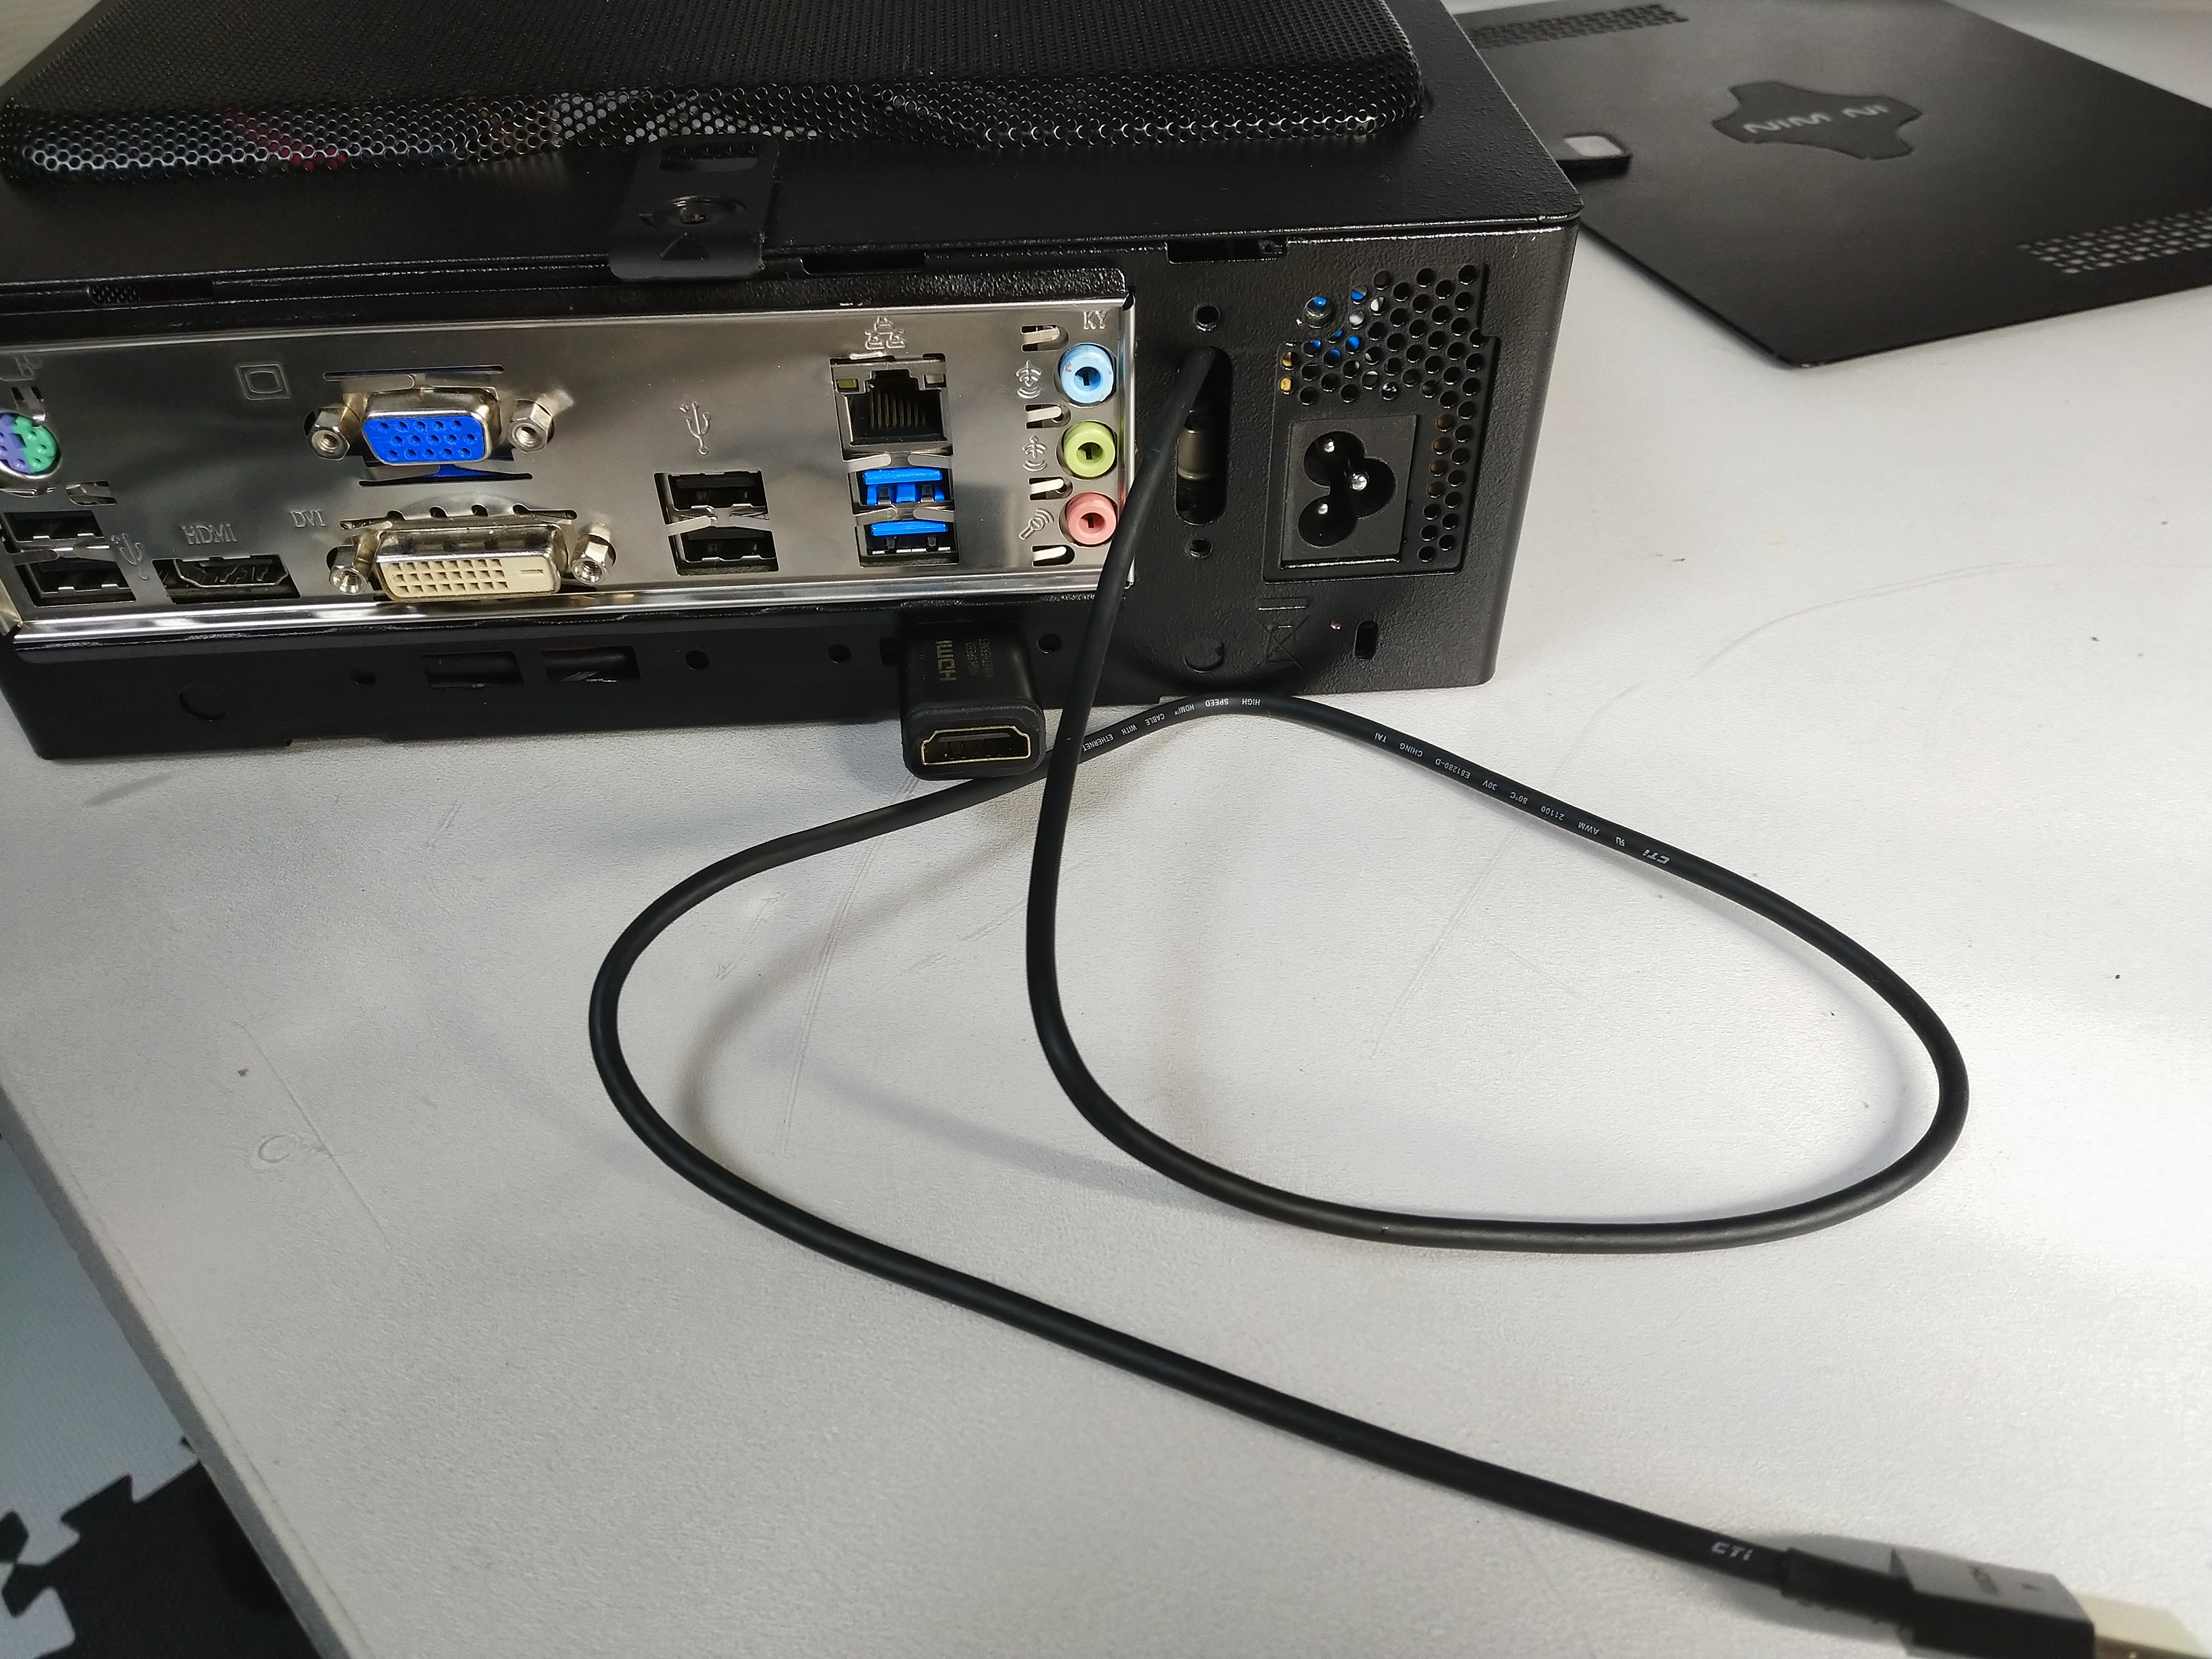
9.Chopin has hidden 3 output holes from storage space(closed in default). Use one of this for one output HDMI. And I recommended you sandwich this hole to connect HDMI adapter and HDMI connector.
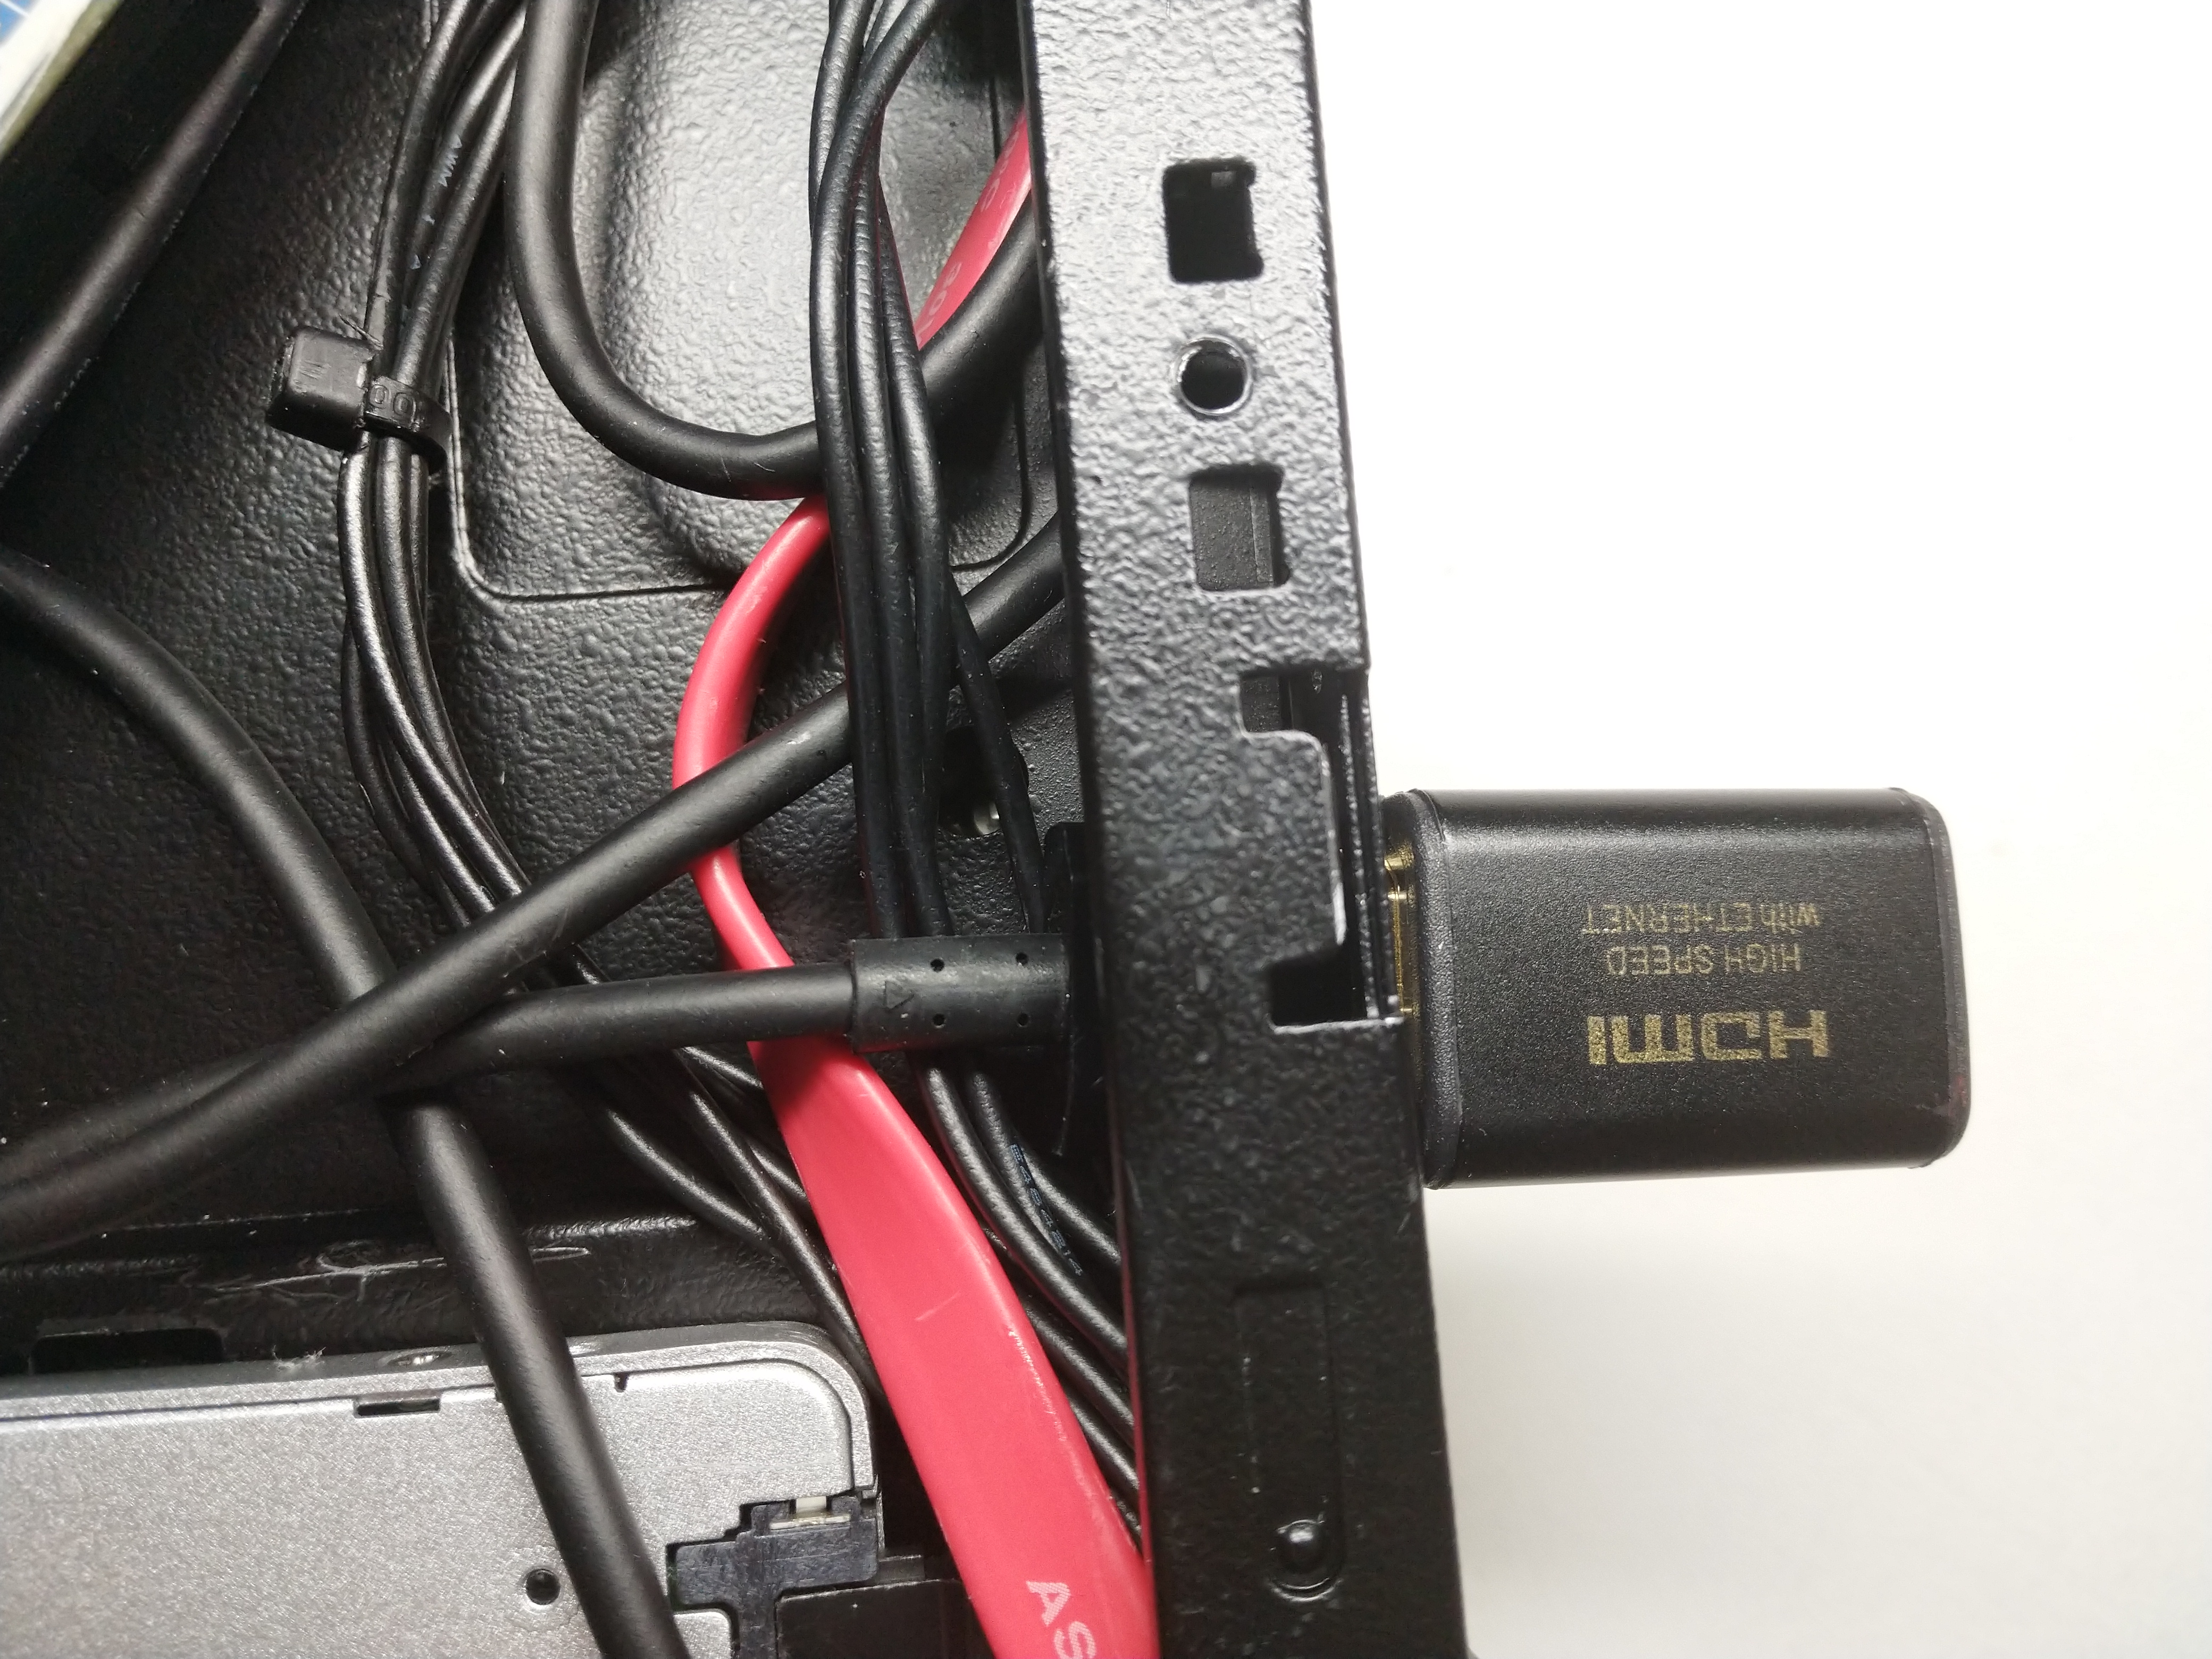
10.Thread the other HDMI output to motherboard space.
11.Chopin has hidden 1 output hole from motherboard space(closed in default). Use this for other output HDMI. You can output this cable directly or sandwich with connector like above.
12.Cover PCB of GPU a insulting sheet.
13.Close side panels and set alminium exterior.
14.Boot it. Have fun!
Conclusion
I succeeded to equipping GPU to Chopin without customizing case. Therefore I can use ryzen 7 1800X with this chopin.
Now old CPU(core i7 2600K) is already running in this chopin, But if I buy Zen 2, I will replace it from an old cpu to Ryzen 7.
Thank you for reading!